Admin Profile
The Admin Profile provides Axis Solutions administrators with a centralised view to manage all registered companies, virtual devices, payments, and platform users.
Dashboard
Upon logging in as an administrator, you are directed to the Admin Dashboard. This provides a real-time summary of the platform, including:
| Metric | Description |
|---|---|
| Devices Pending Registration | Virtual devices awaiting ZIMRA registration |
| Pending Companies | Companies awaiting verification |
| Pending Payments | Devices with outstanding payments |
| All Companies | Total number of registered companies |
| Active Companies | Companies currently active on the platform |
| Inactive Companies | Companies that are no longer active |
| All Devices | Total virtual devices created across all companies |
| Active Devices | Devices currently active and in use |
A Revenue section at the bottom of the dashboard displays income trends, filterable by Today, Week, Month, or Year.
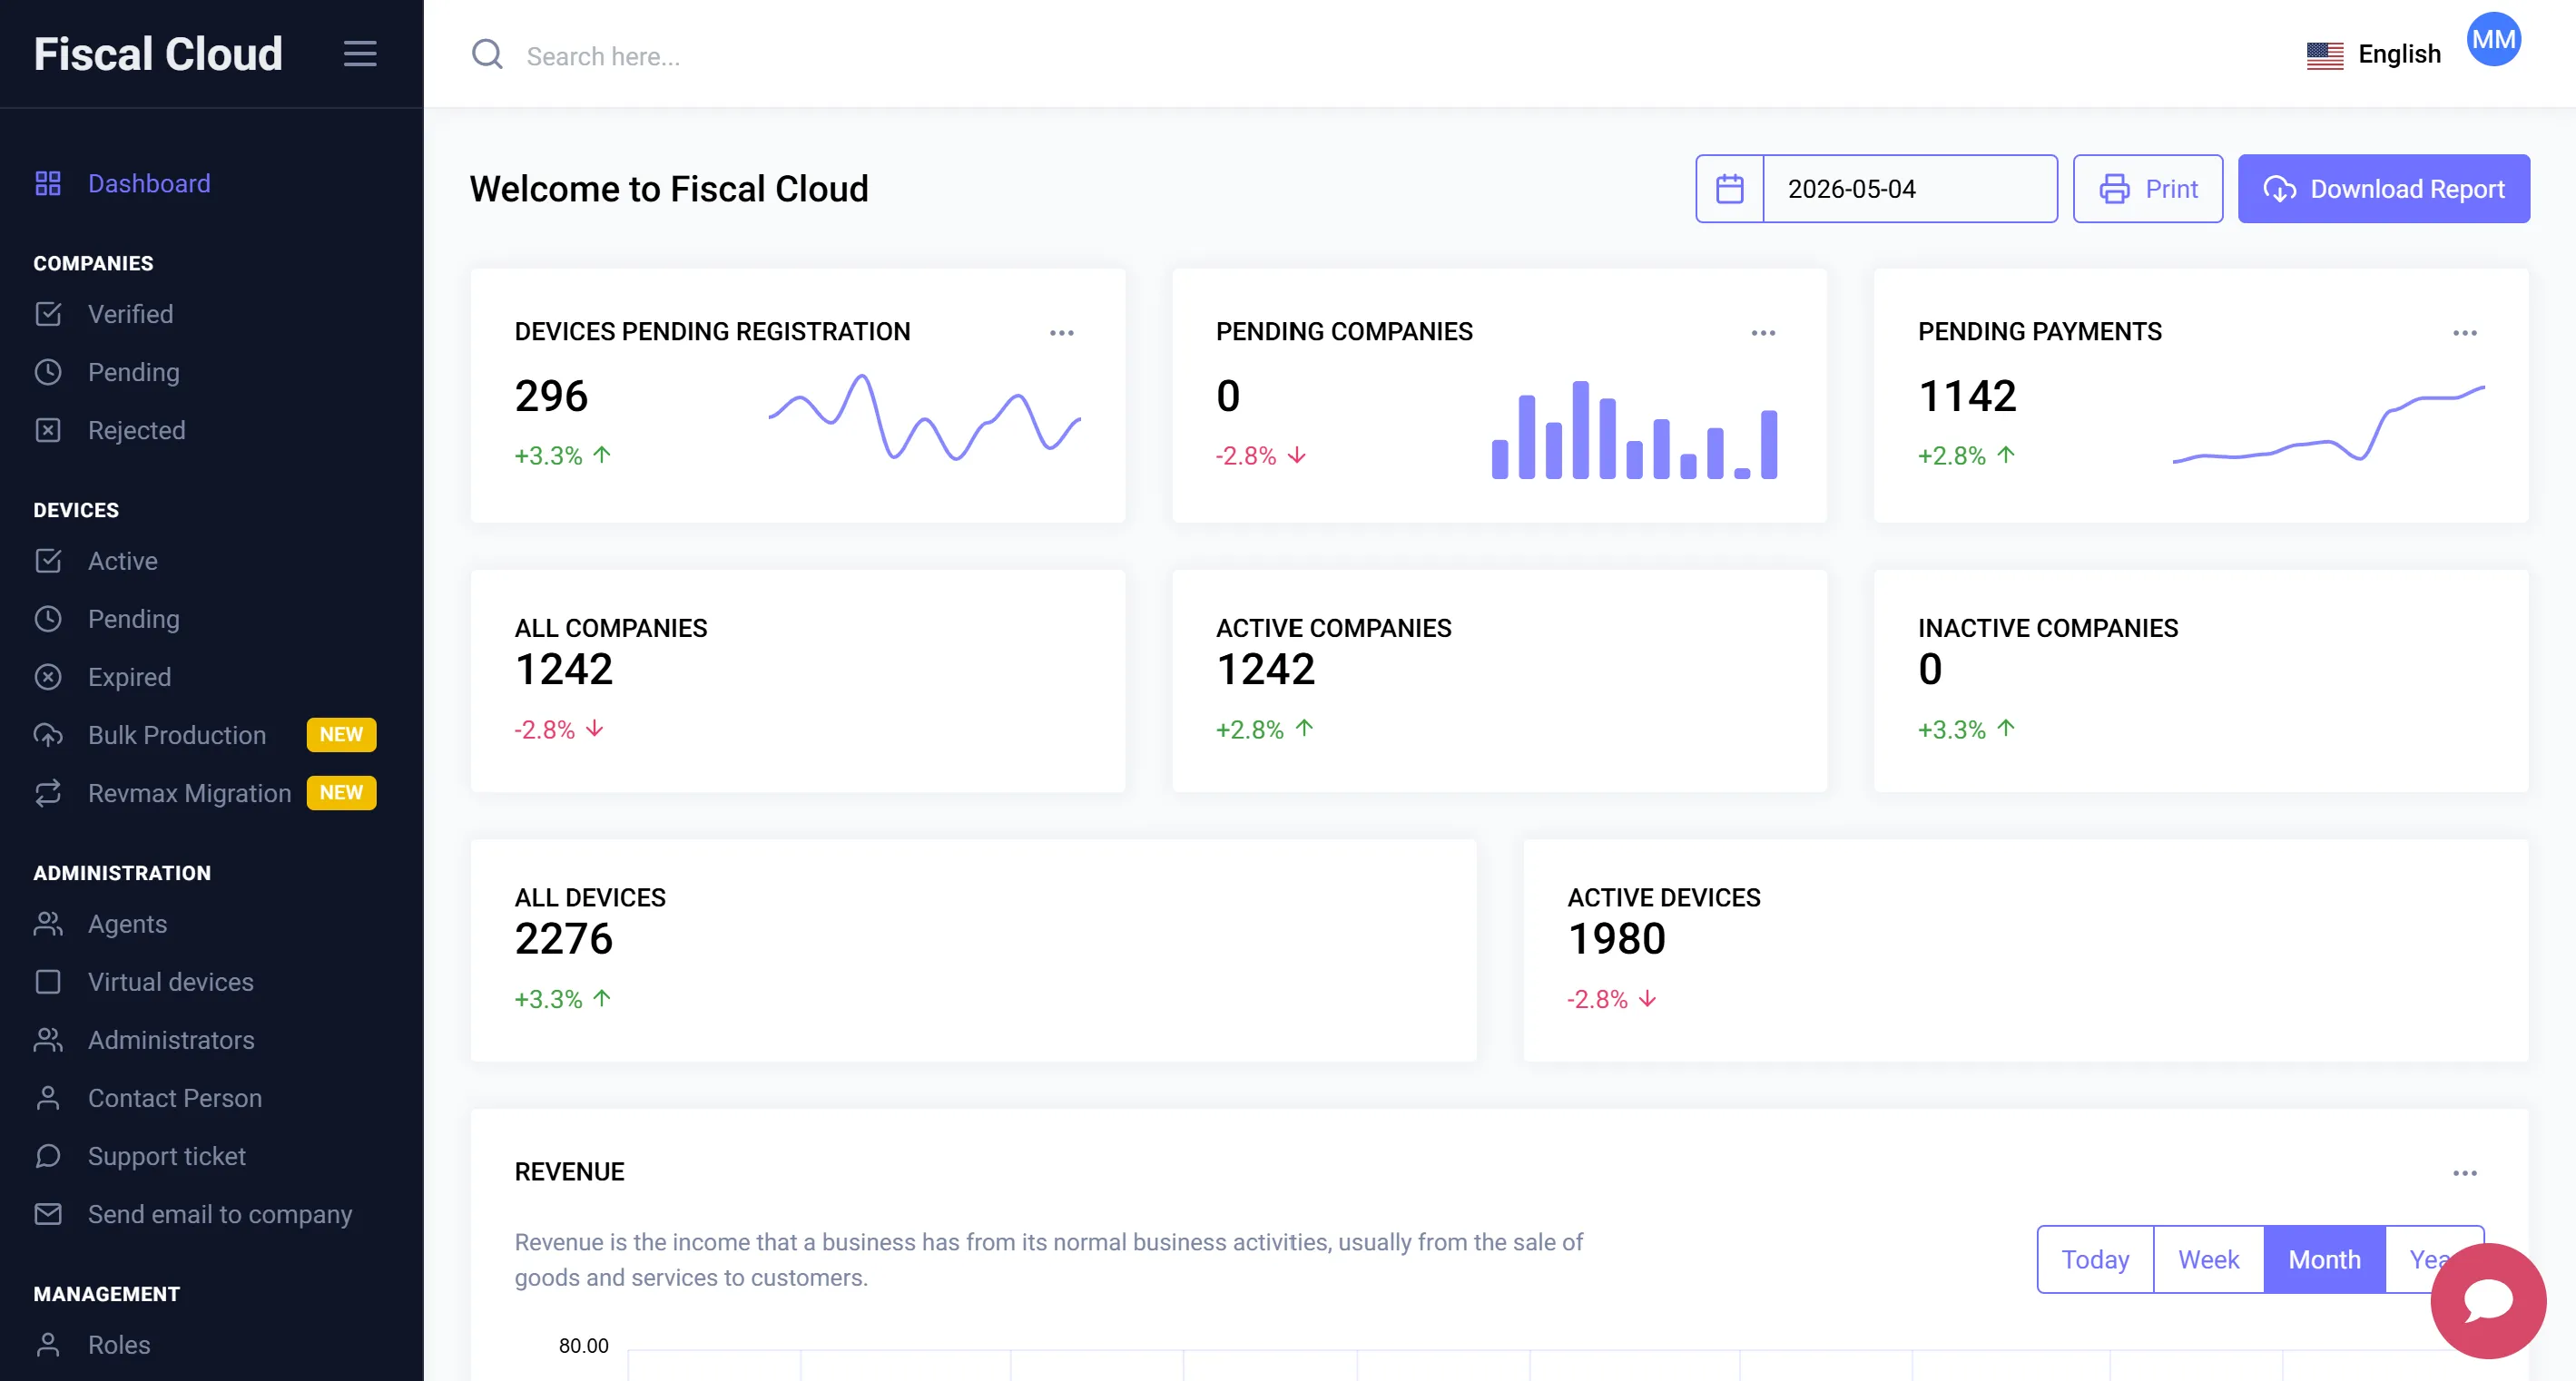
On the bottom right corner, you can access Alexis, the virtual assistant, for live support.
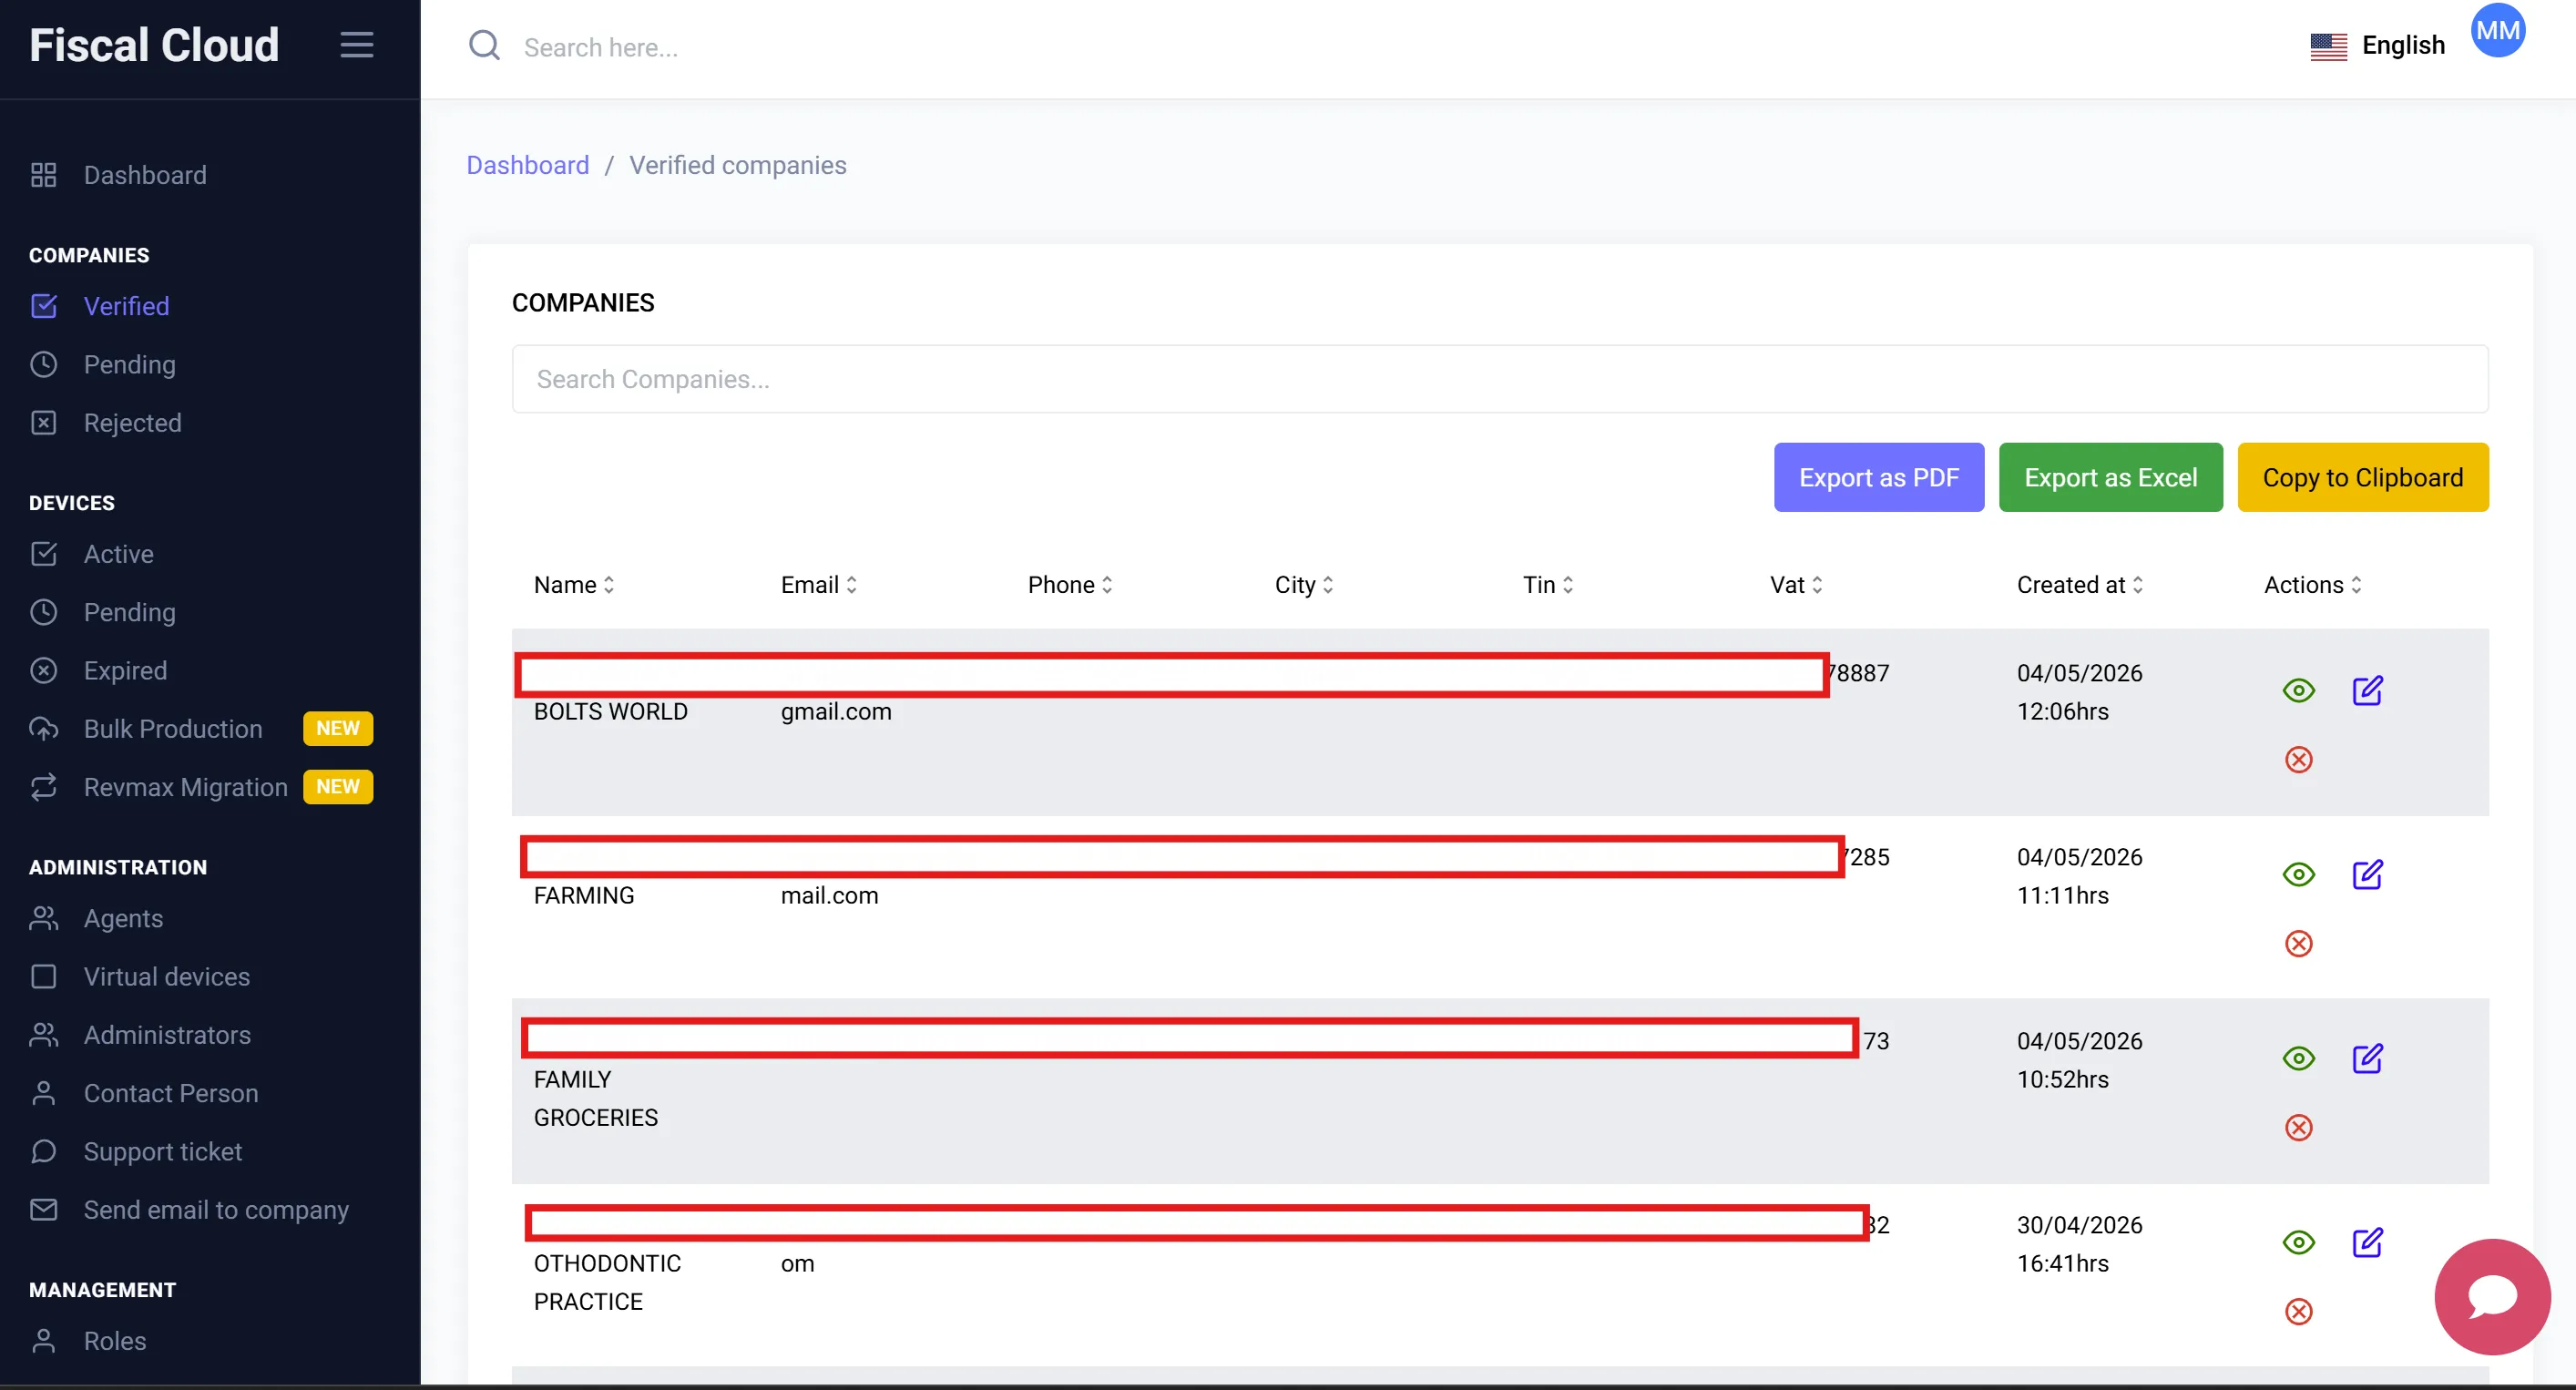
Companies
The left-hand panel contains the Companies section, with three sub-categories:
- Verified — Companies that have been approved and are active on the platform.
- Pending — Companies awaiting review and verification by Axis Solutions.
- Rejected — Companies whose registration was not approved.
Each company listing displays:
- Name
- Phone
- City
- TIN
- VAT
- Date Created
- Actions (View, Edit, Reject)
Viewing a Company
Clicking on a company opens a detailed view with the following tabs:
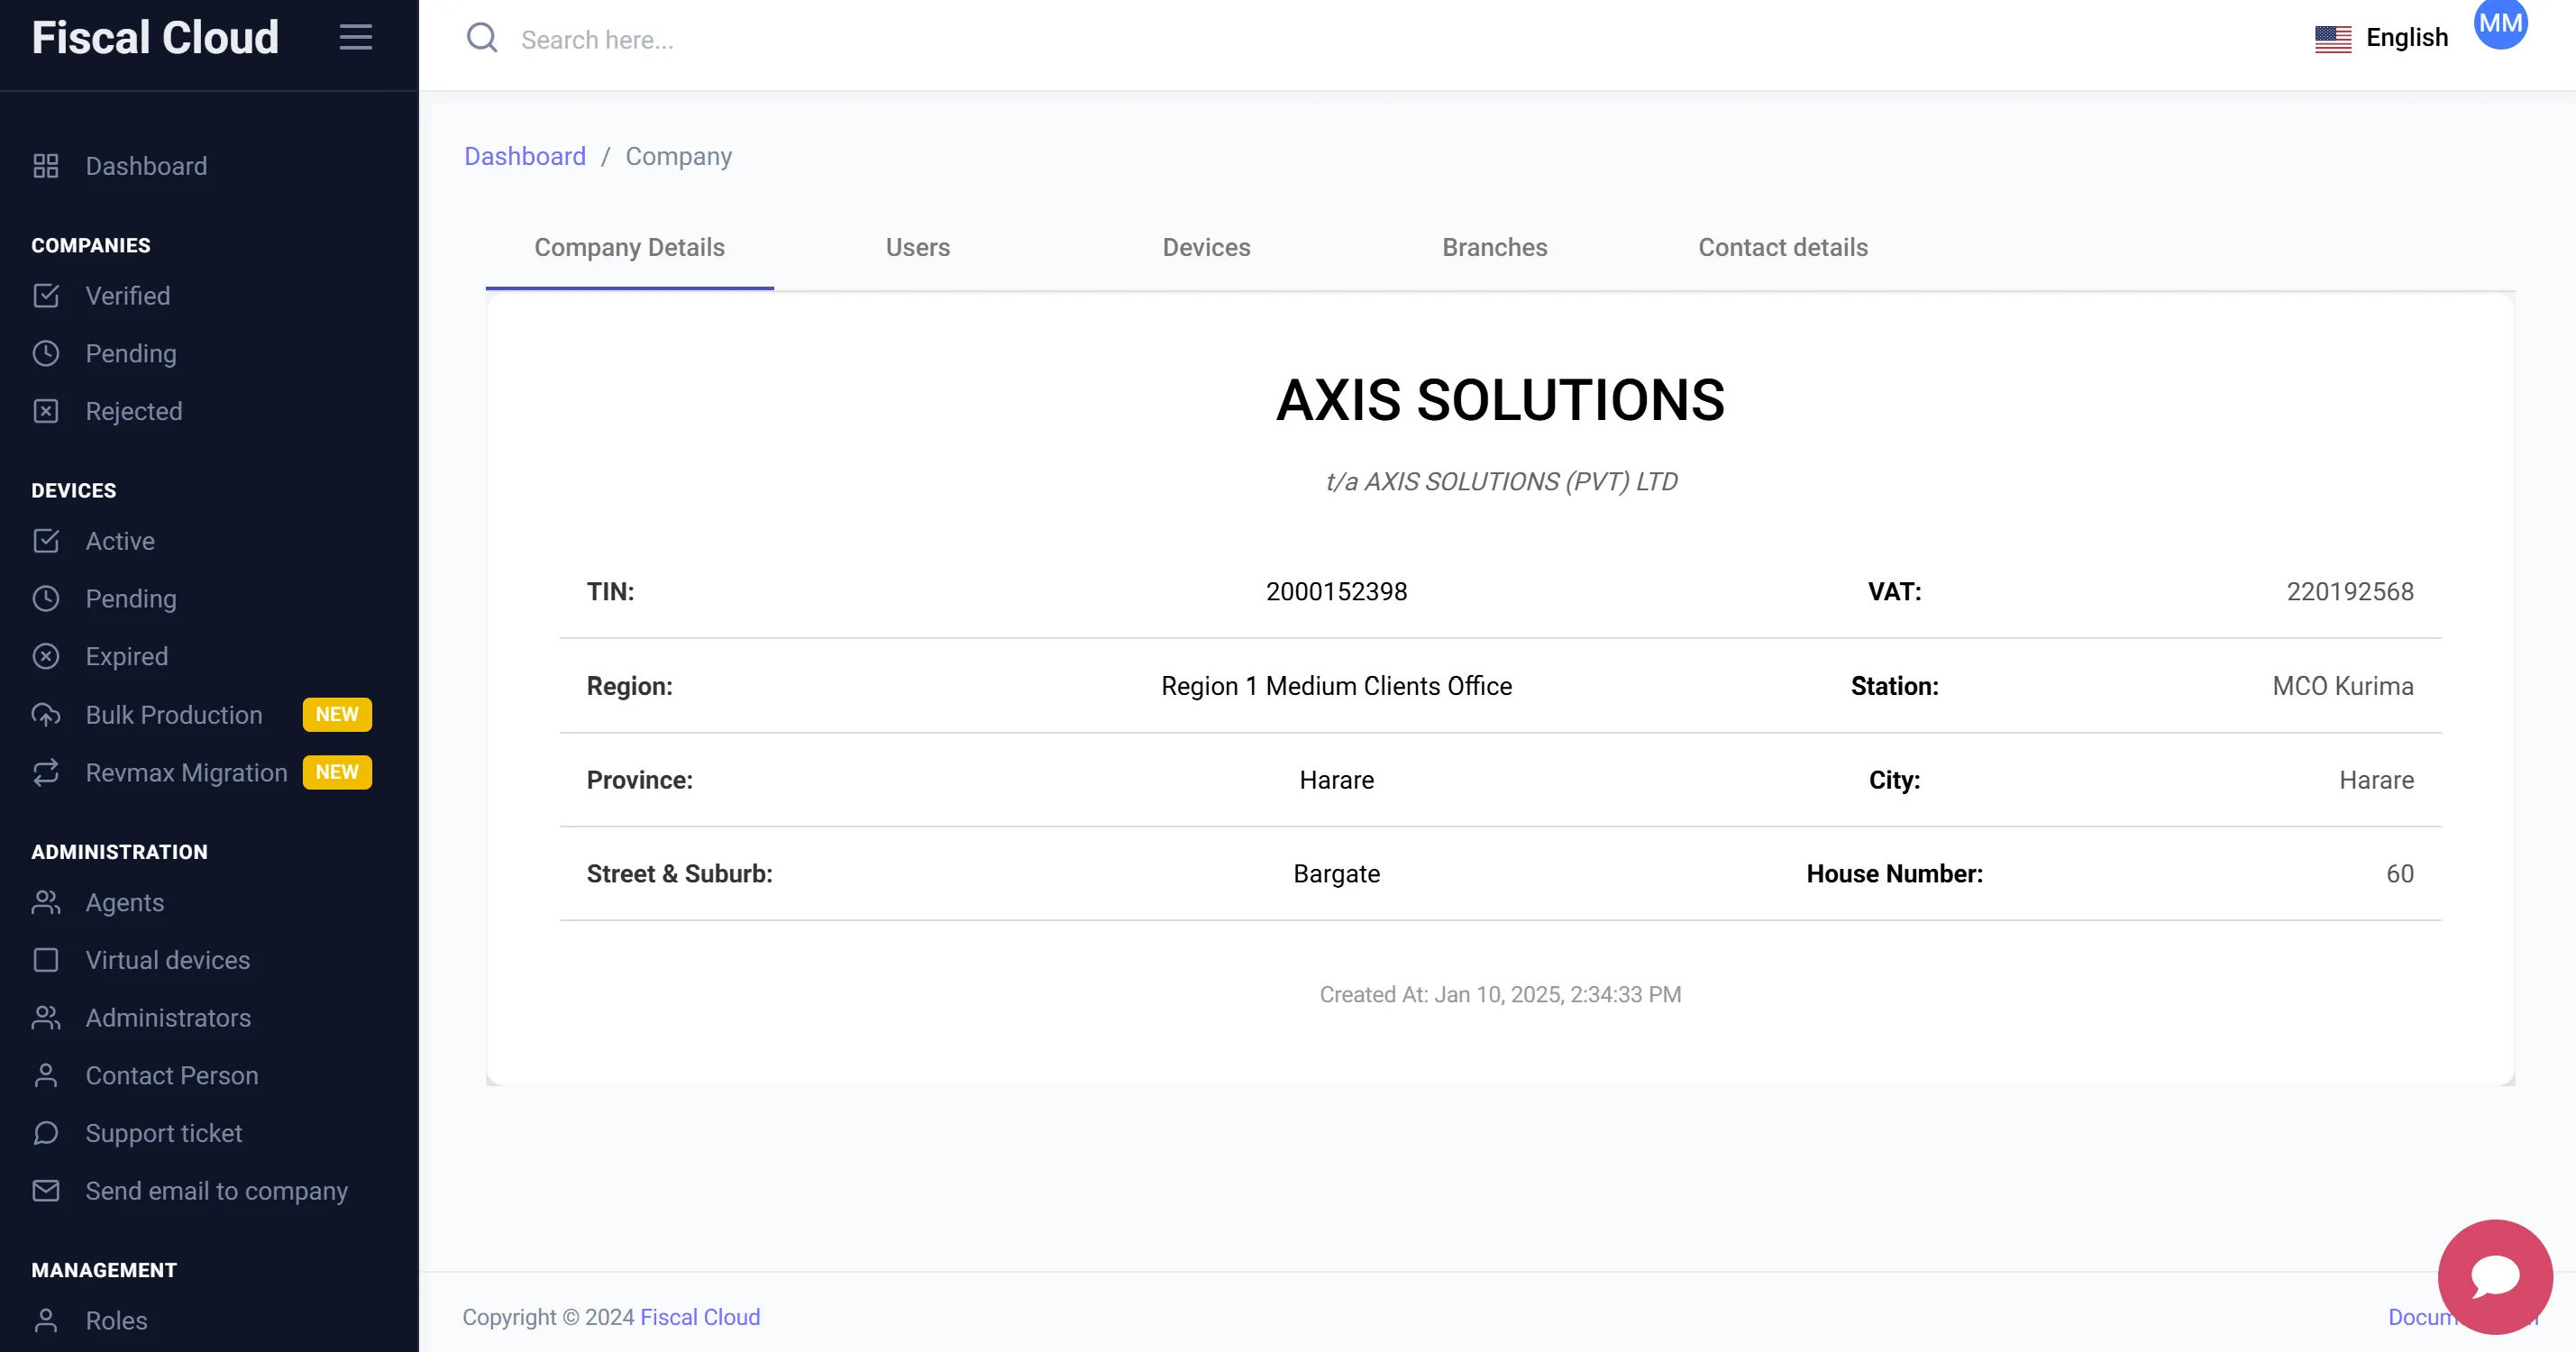
Company Details
Displays the company’s registered information, including:
- TIN and VAT number
- Region and Station
- Province, City, Street & Suburb, and House Number
- Tax Certificate (viewable link)
- Status (Active / Inactive)
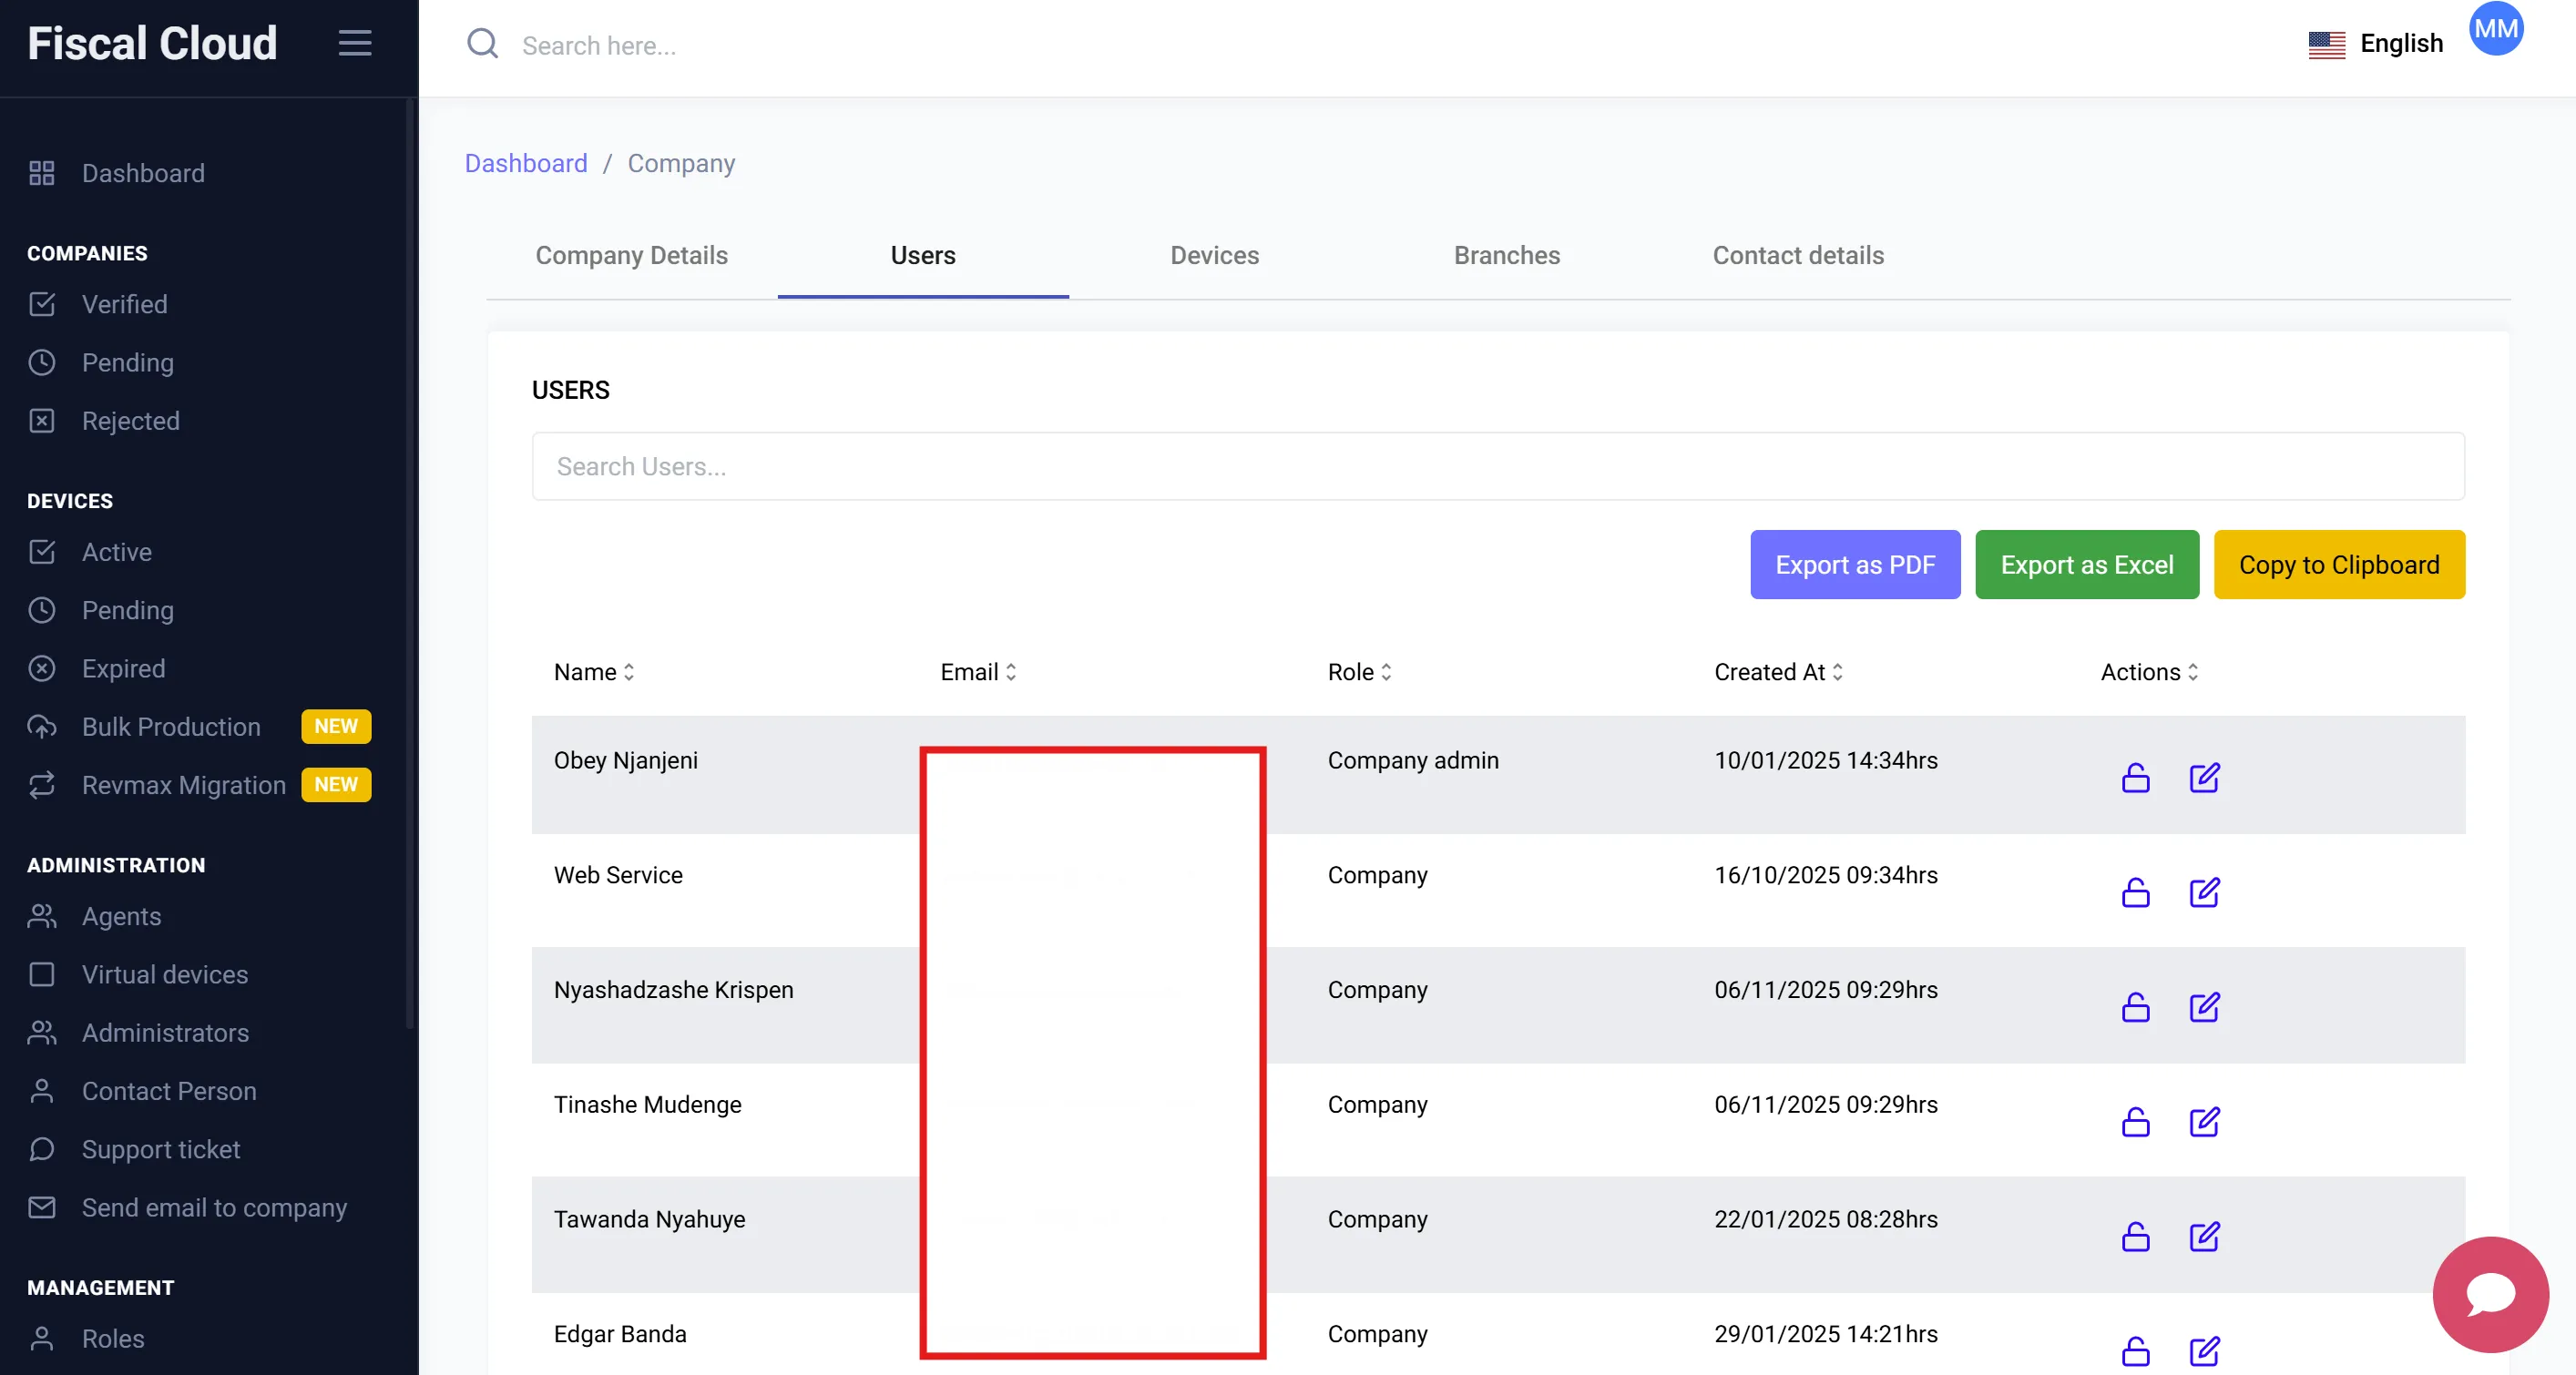
Users
Lists all users associated with the company. For each user you can see:
- Name
- Role
- Date Created
- Actions (Reset password, Edit)
Users can be exported as PDF, Excel, or copied to clipboard.
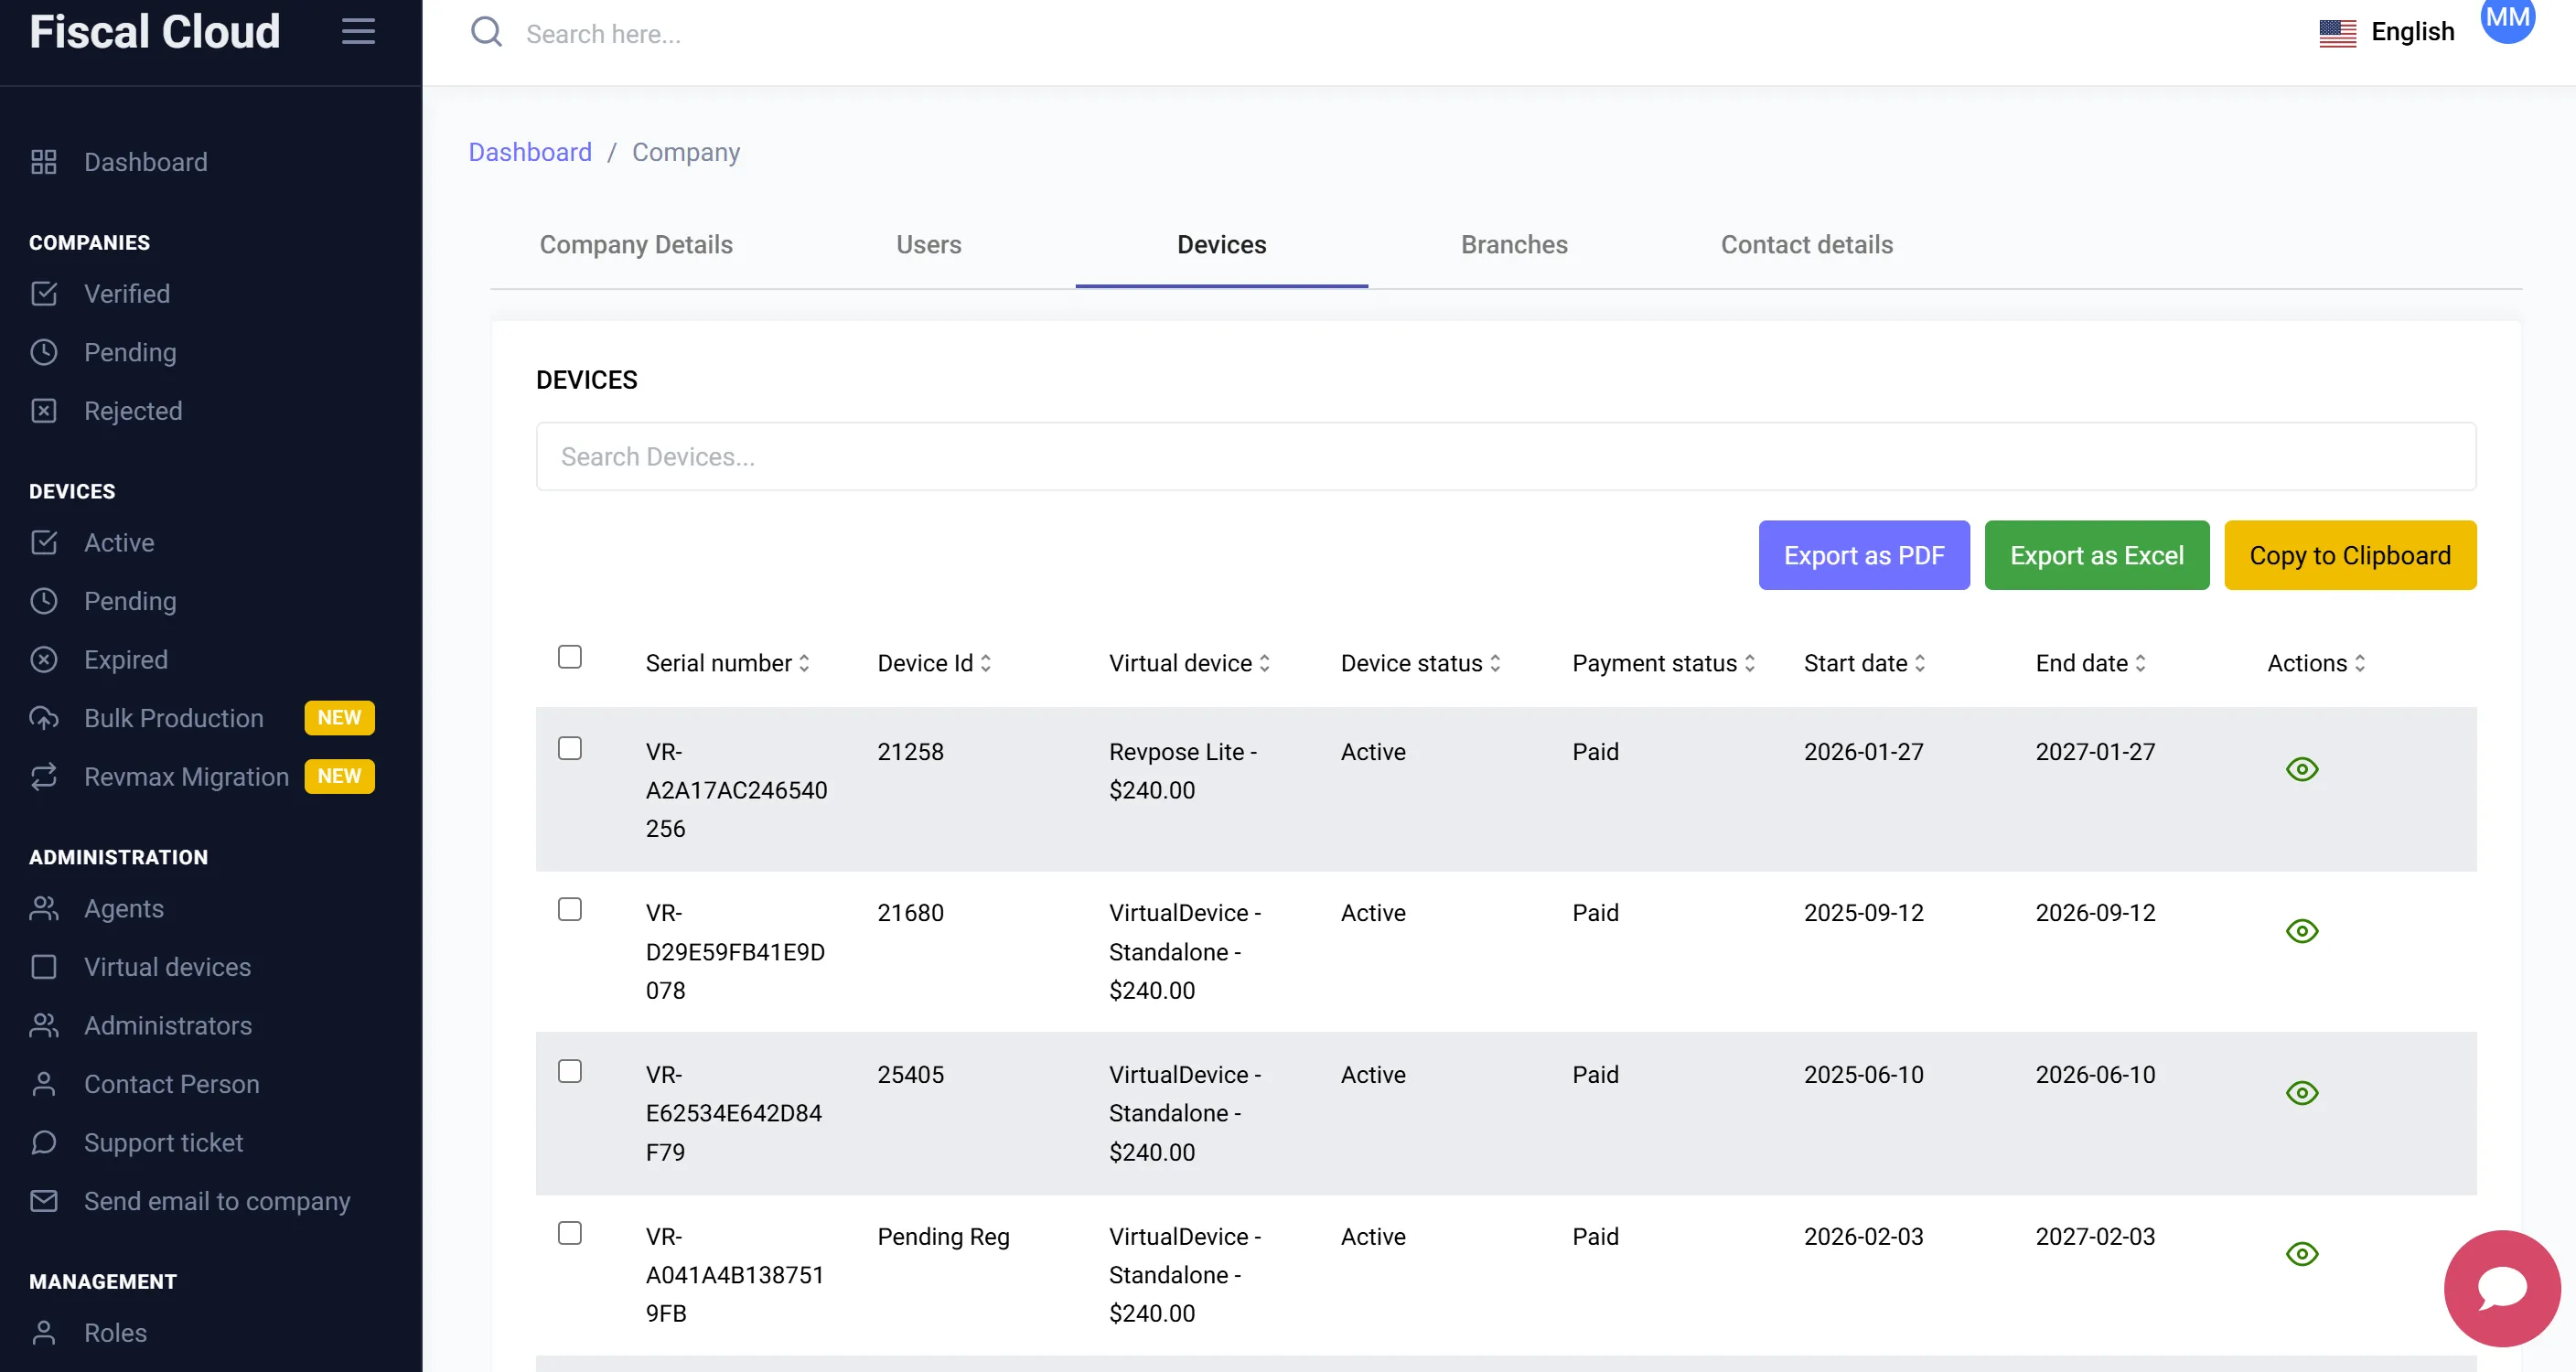
Devices
Shows all virtual devices registered under the company. Each device entry displays:
- Serial Number
- Device ID
- Virtual Device type and plan
- Device Status (Active / Pending)
- Payment Status (Paid / Unpaid)
- Start Date and End Date
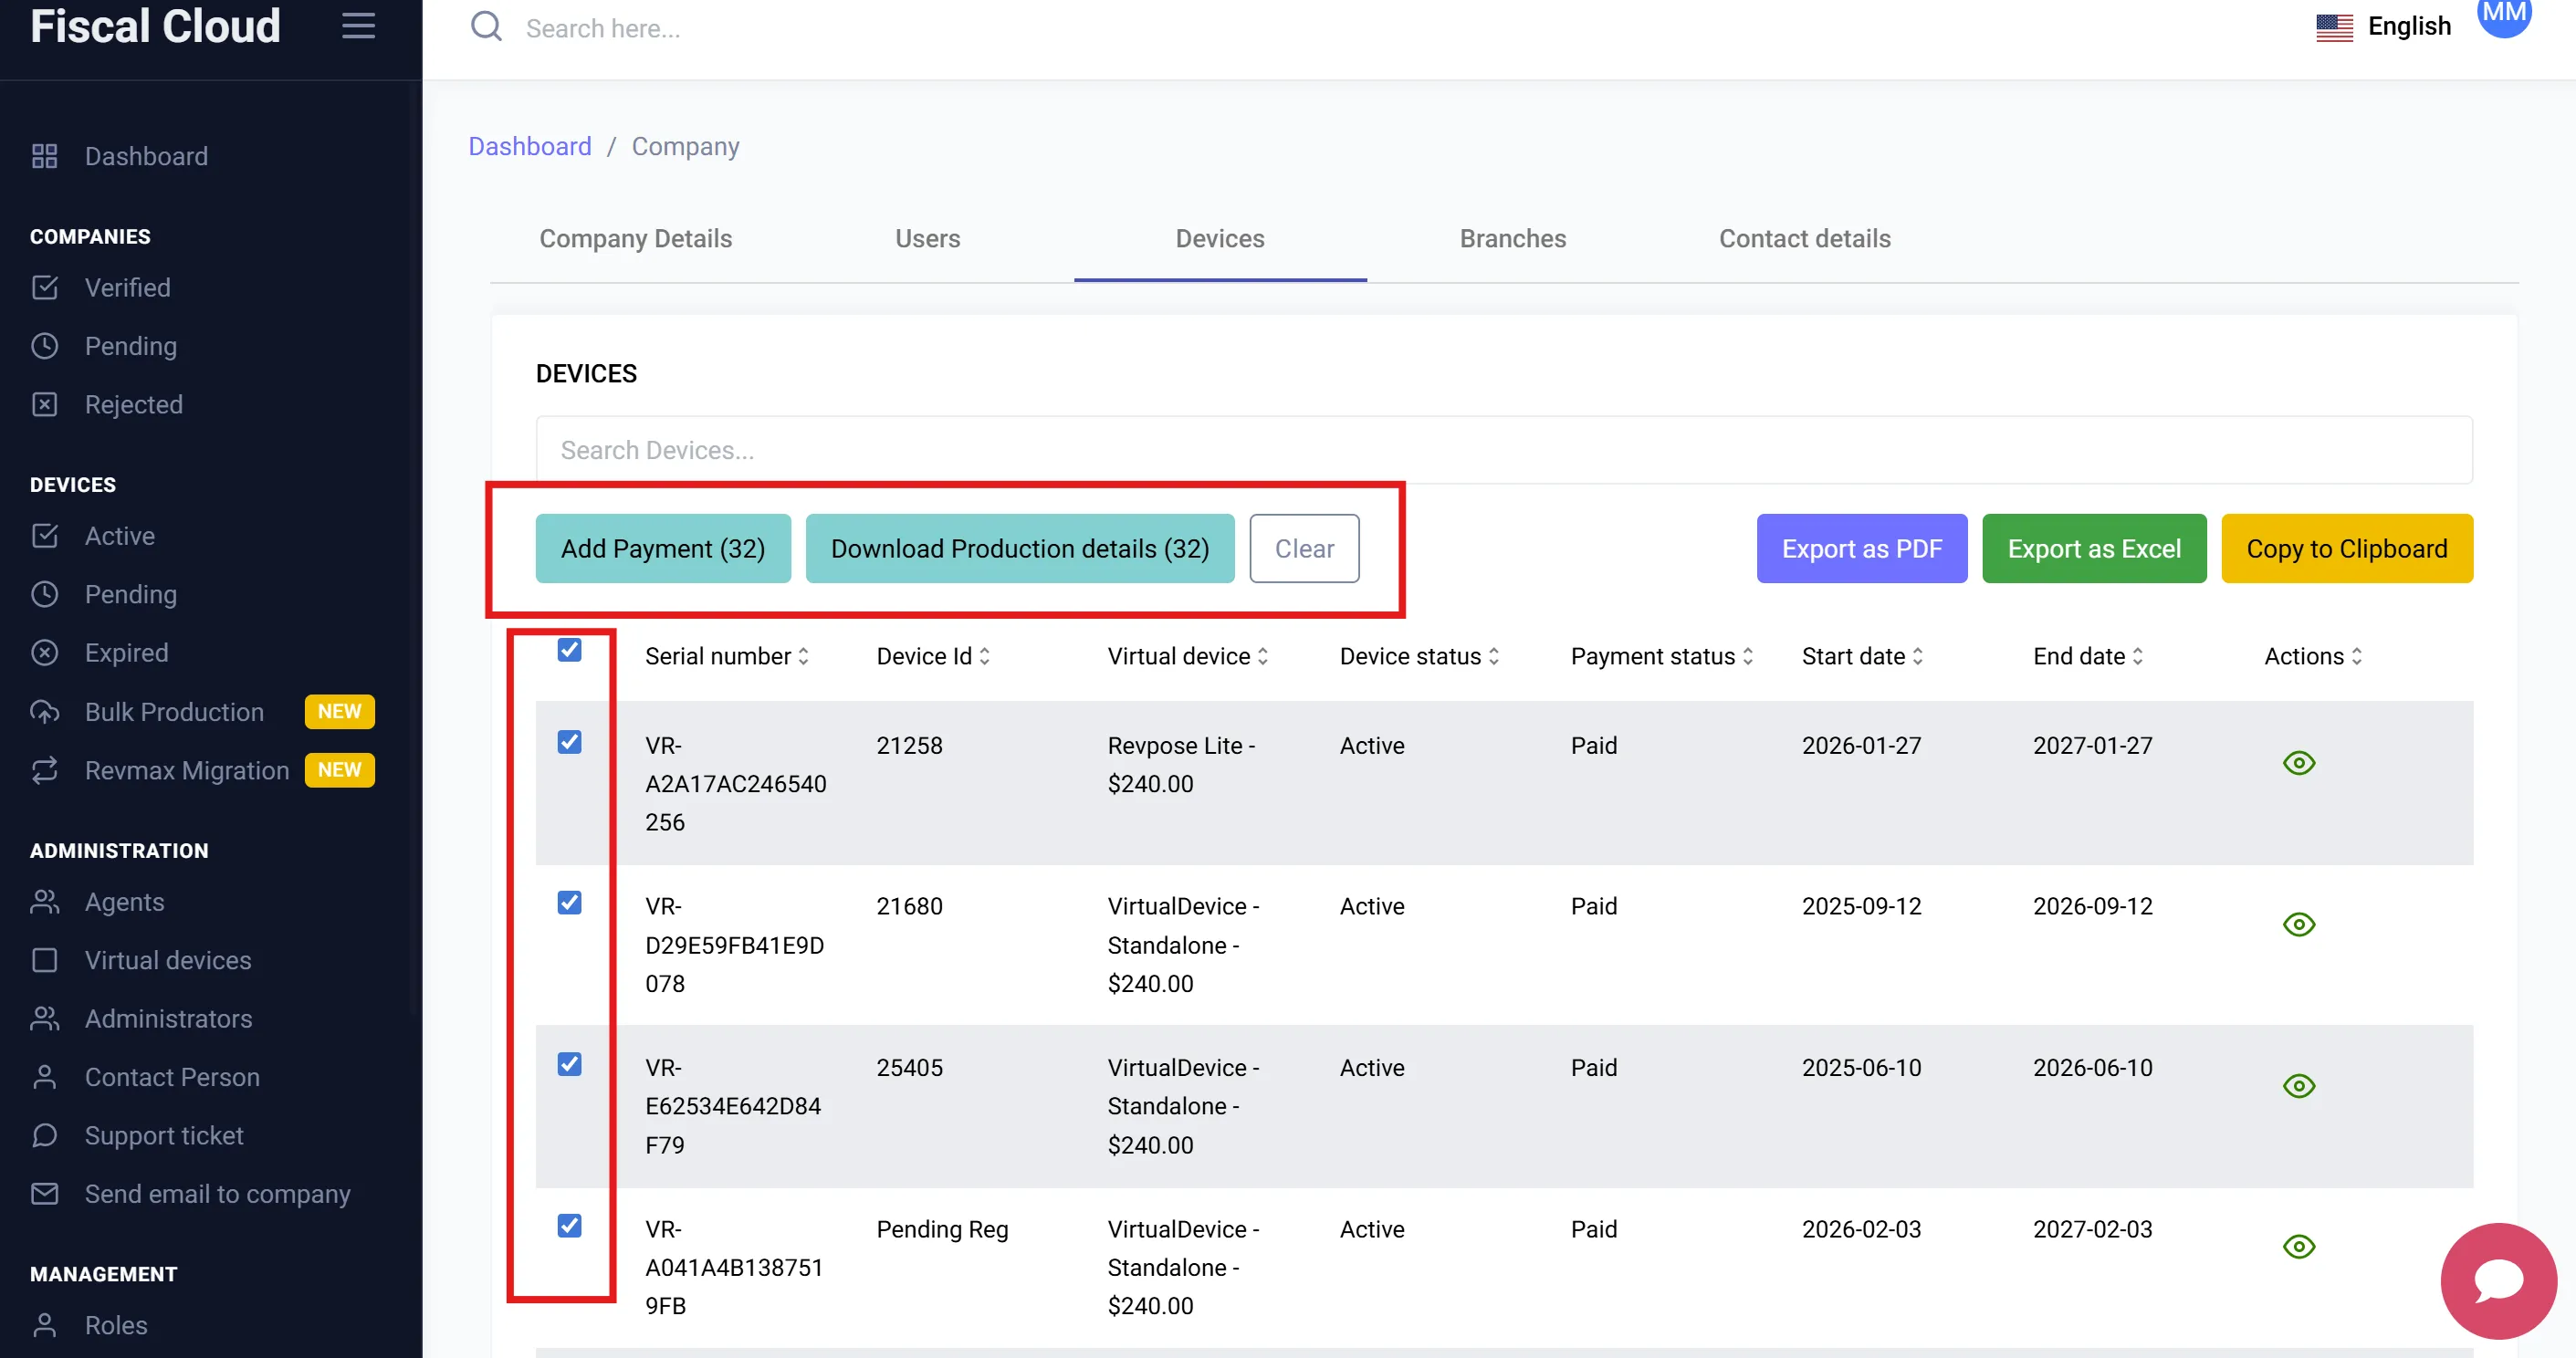
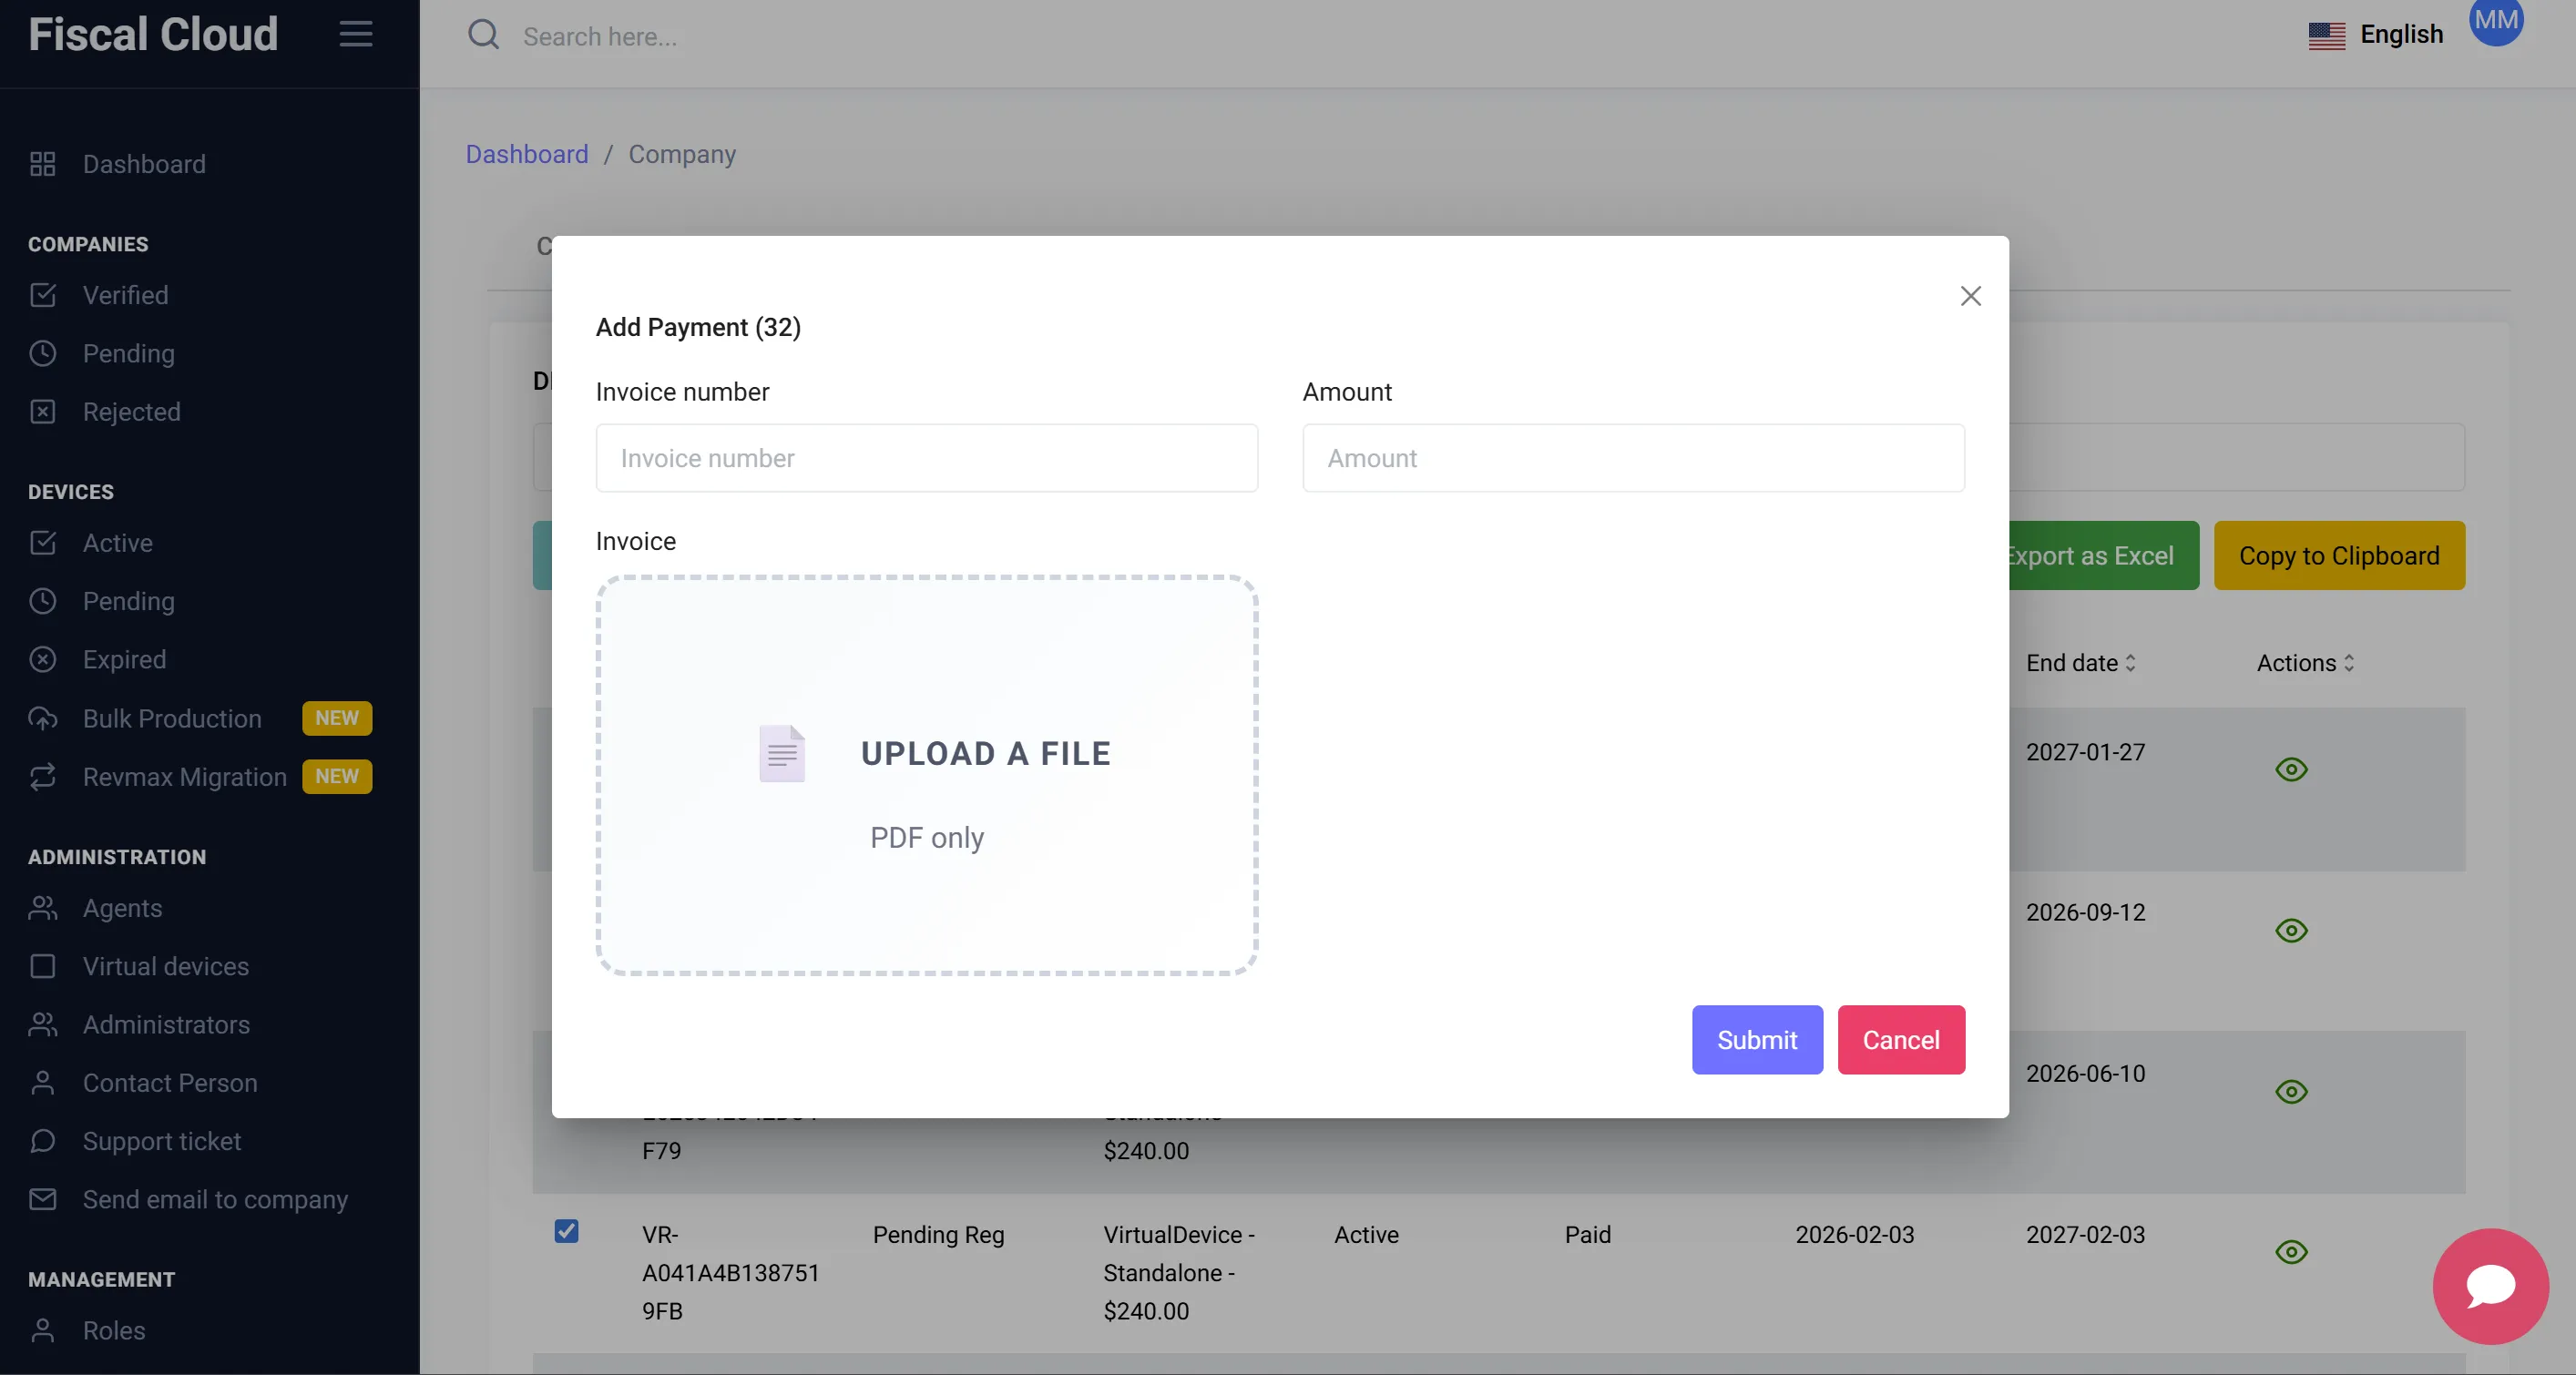
To process a payment for a device:
- Select the device(s) using the checkbox.
- Click the “Add Payment” button that appears at the top.
- Complete the payment process.
You can also click “Download Production Details” to export device information.
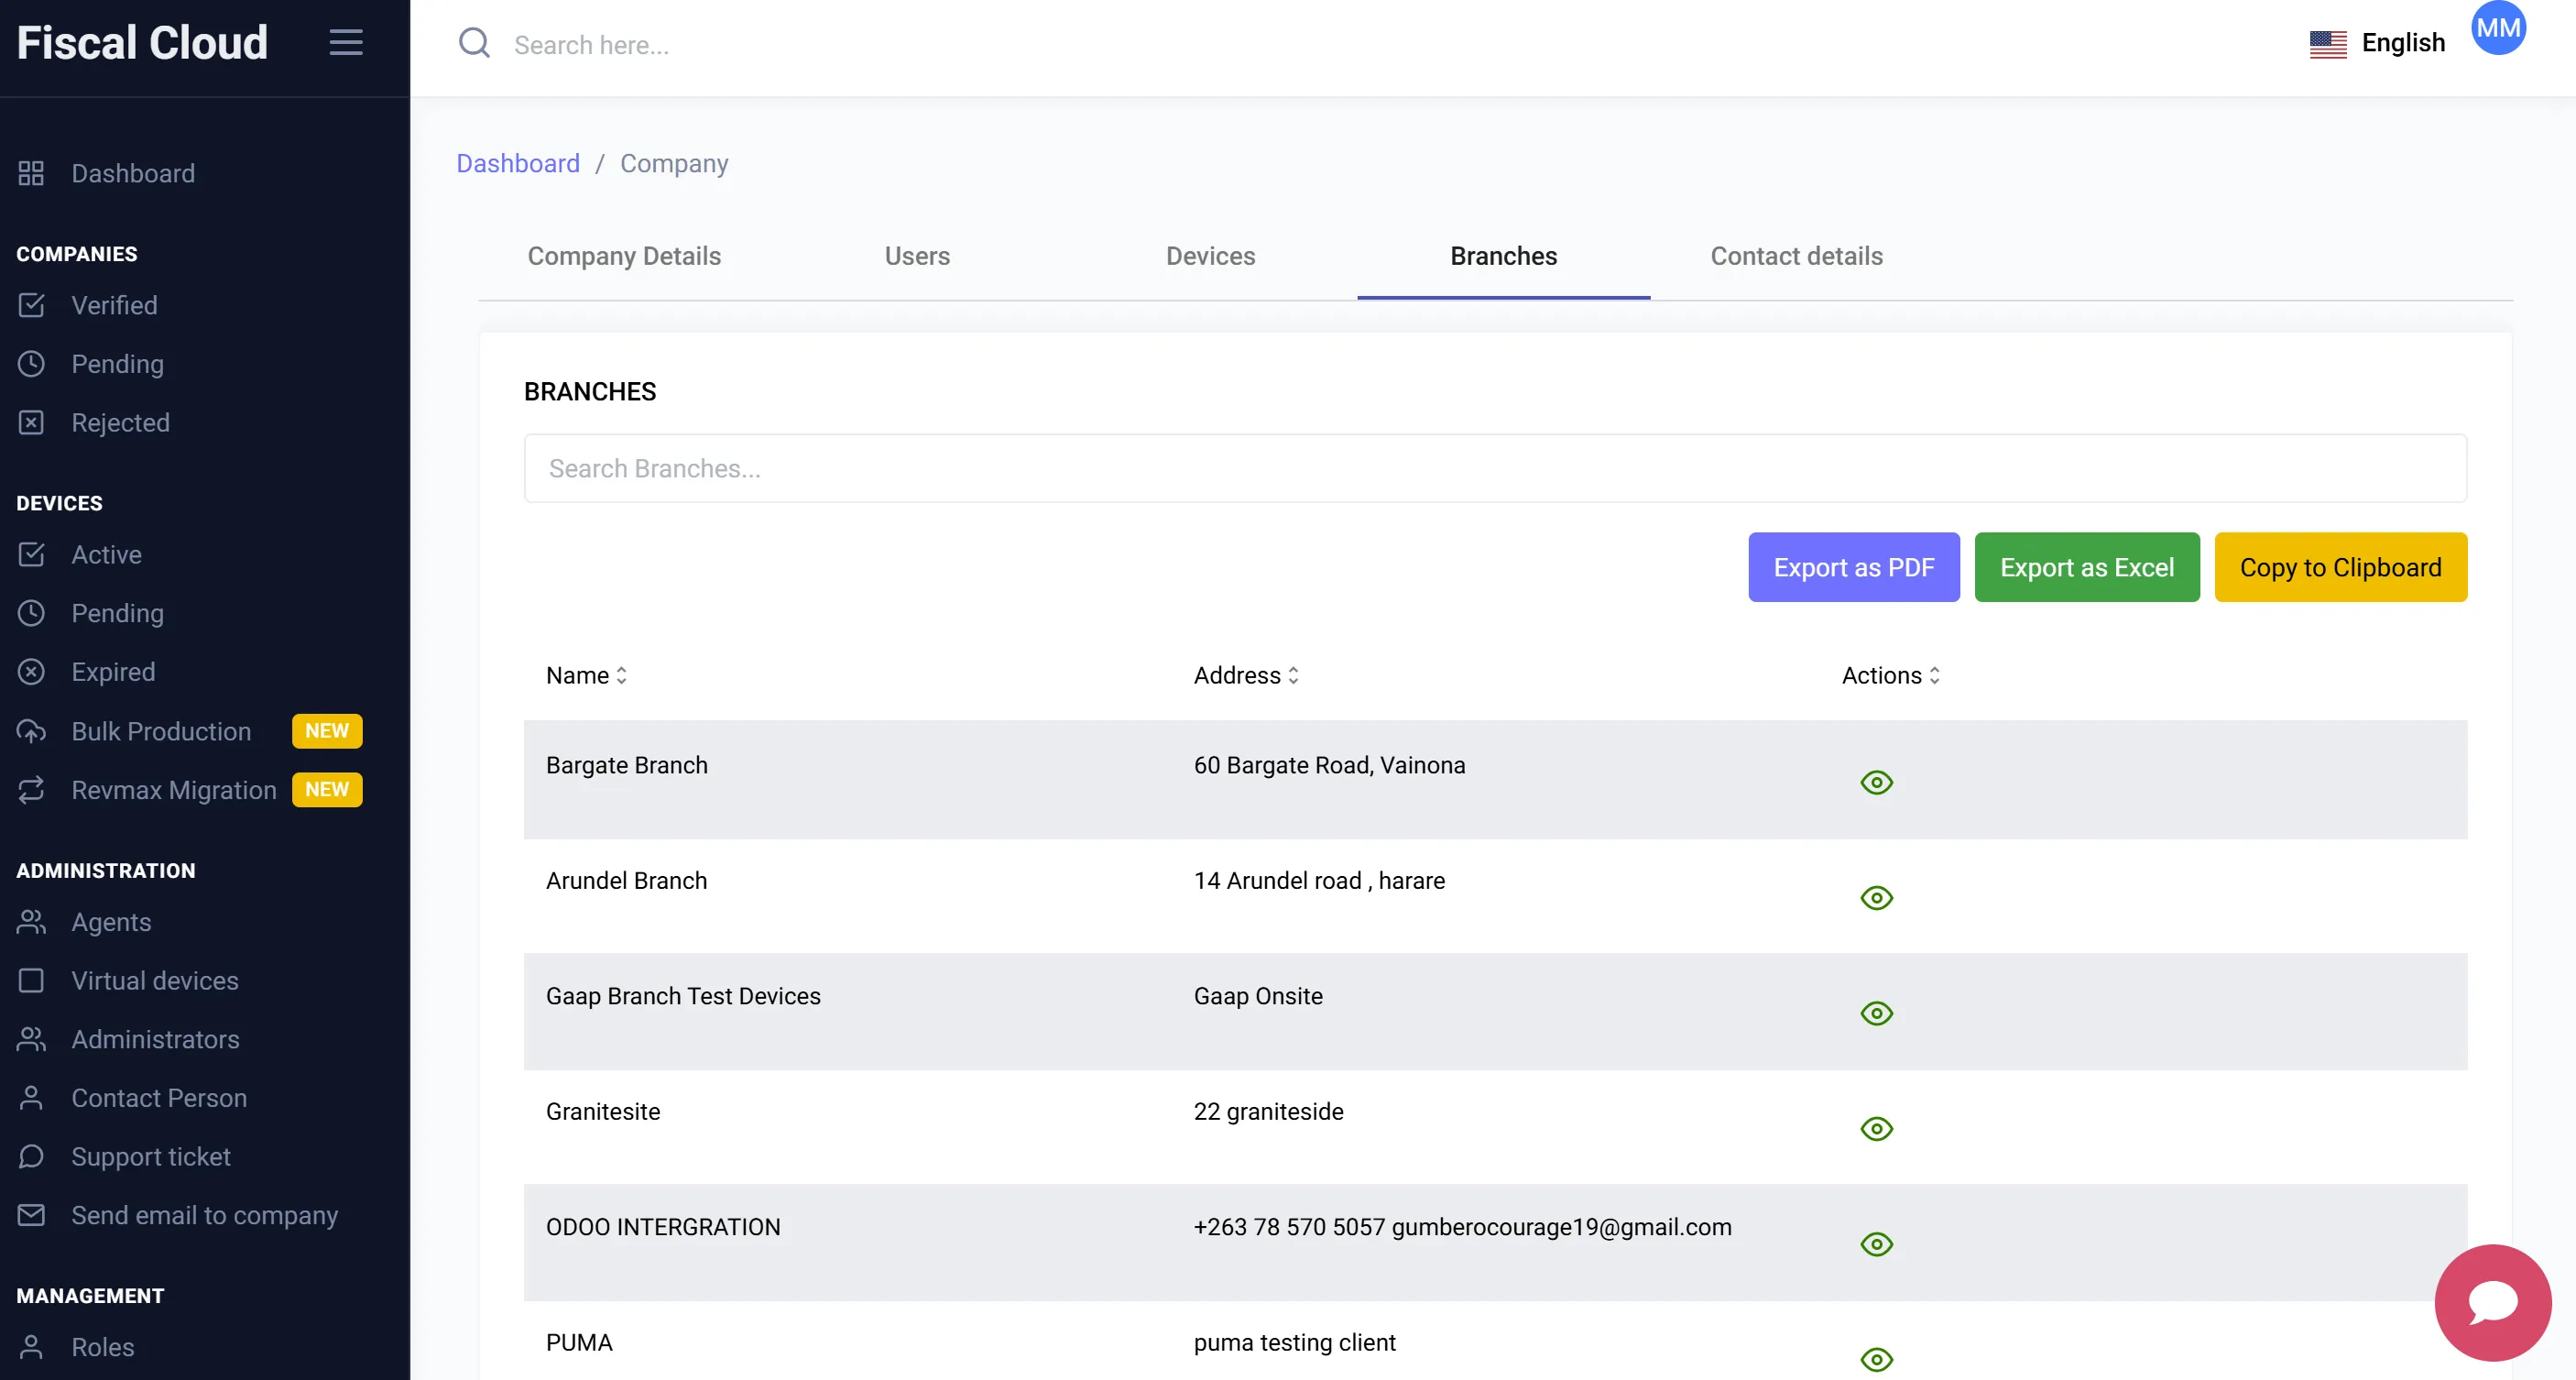
Branches
Displays all branches associated with the company.
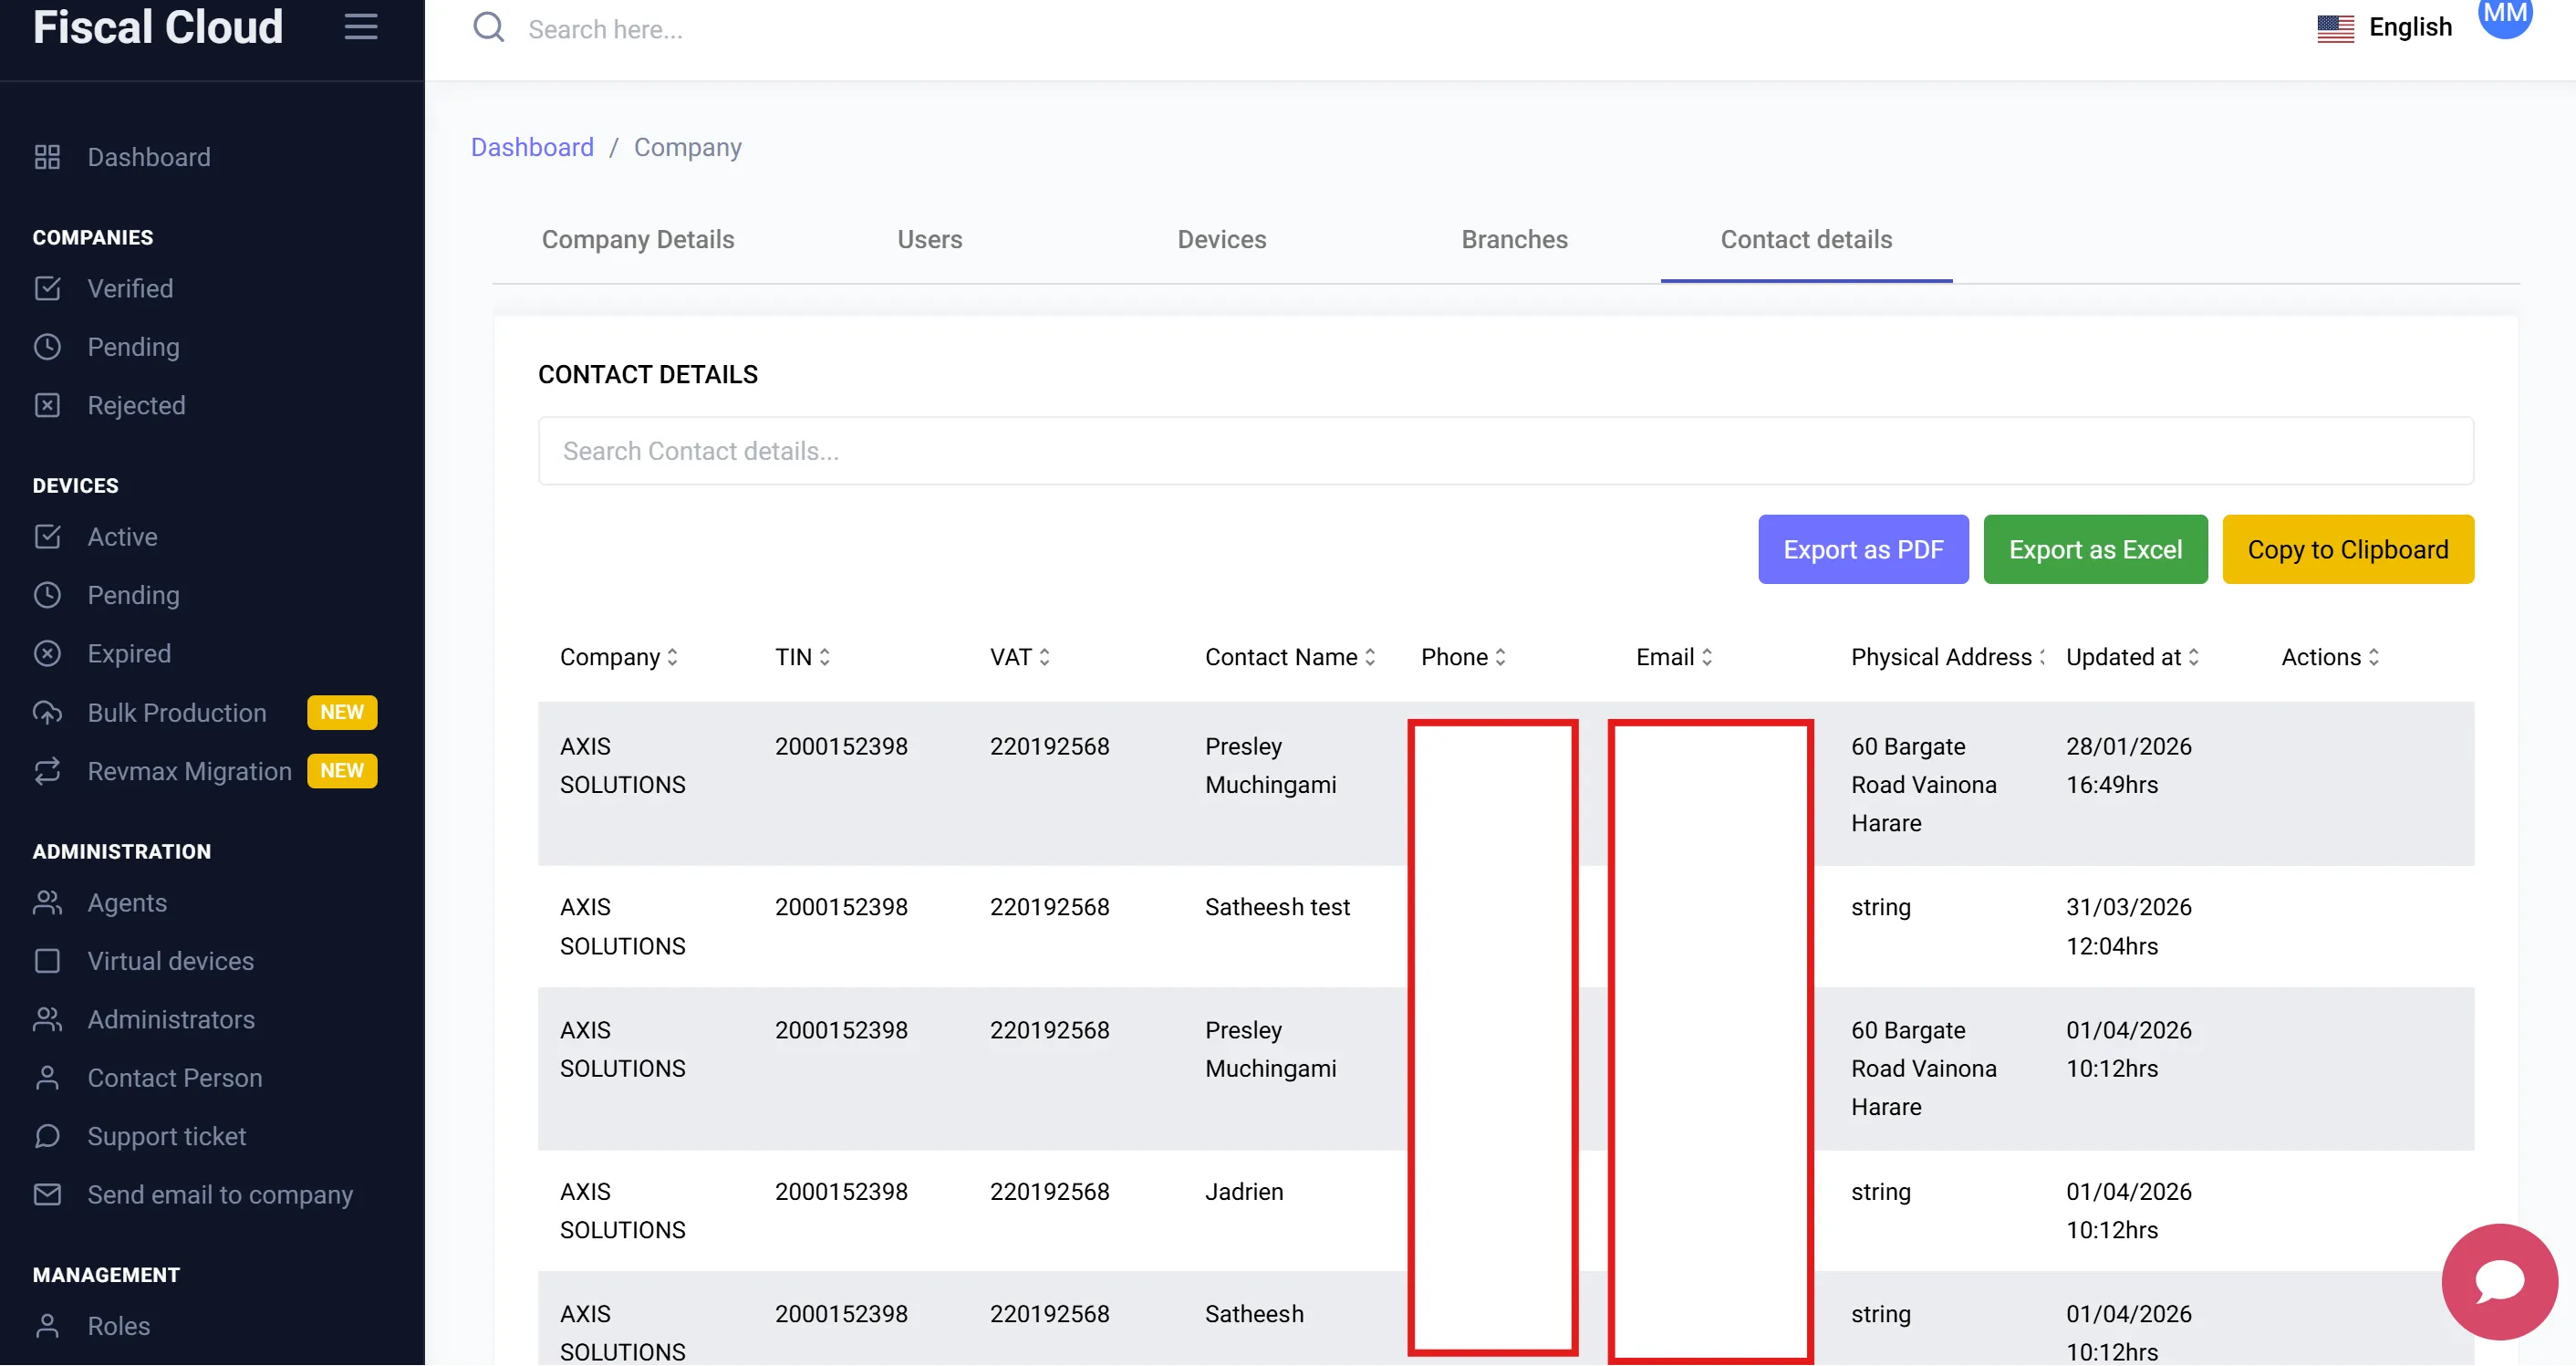
Contact Details
Shows the contact information registered for the company.
Devices
The Devices section in the left-hand panel gives administrators a platform-wide view of all virtual devices, organised into the following sub-categories:
- Active — Devices that are currently paid and operational.
- Pending — Devices awaiting payment or ZIMRA registration.
- Expired — Devices whose subscription period has ended.
- Bulk Production — Tool for moving multiple devices to production at once.
- Revmax Migration — Tool for converting physical Revmax devices into virtual devices.
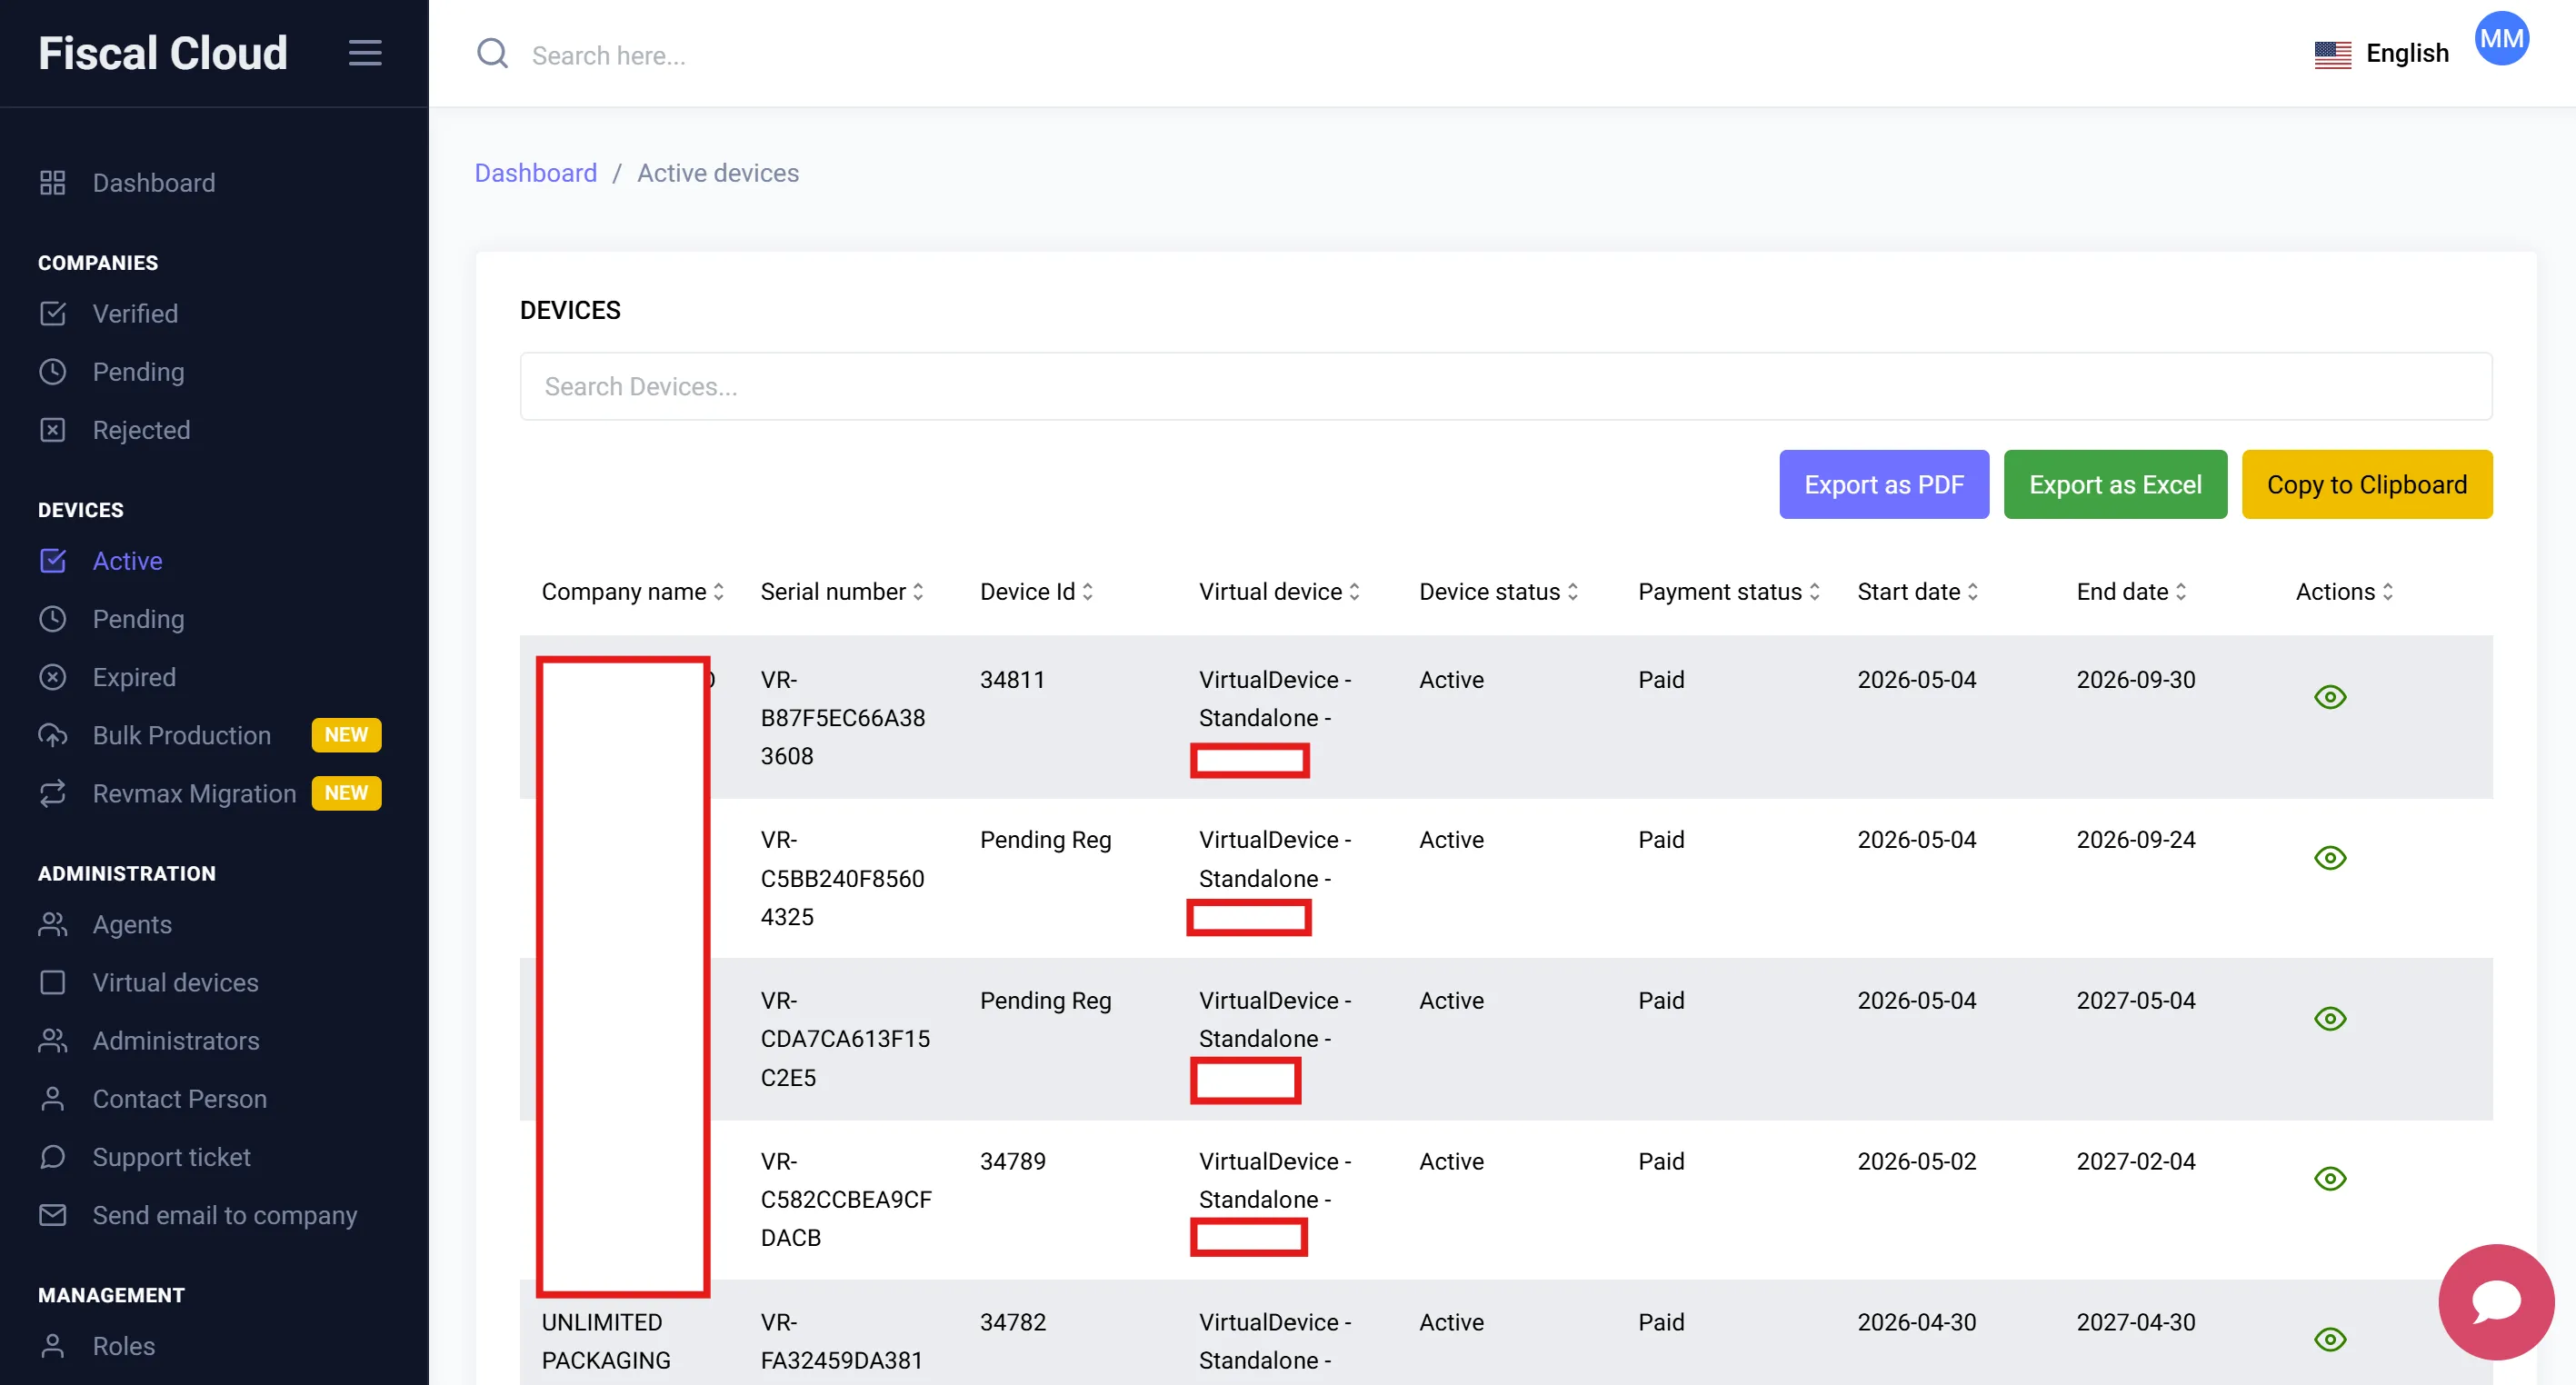
Active Devices
The Active Devices list displays all currently active devices across all companies, with the following columns:
- Company Name
- Serial Number
- Device ID
- Virtual Device (type and plan)
- Device Status
- Payment Status
- Start Date and End Date
Viewing a Device
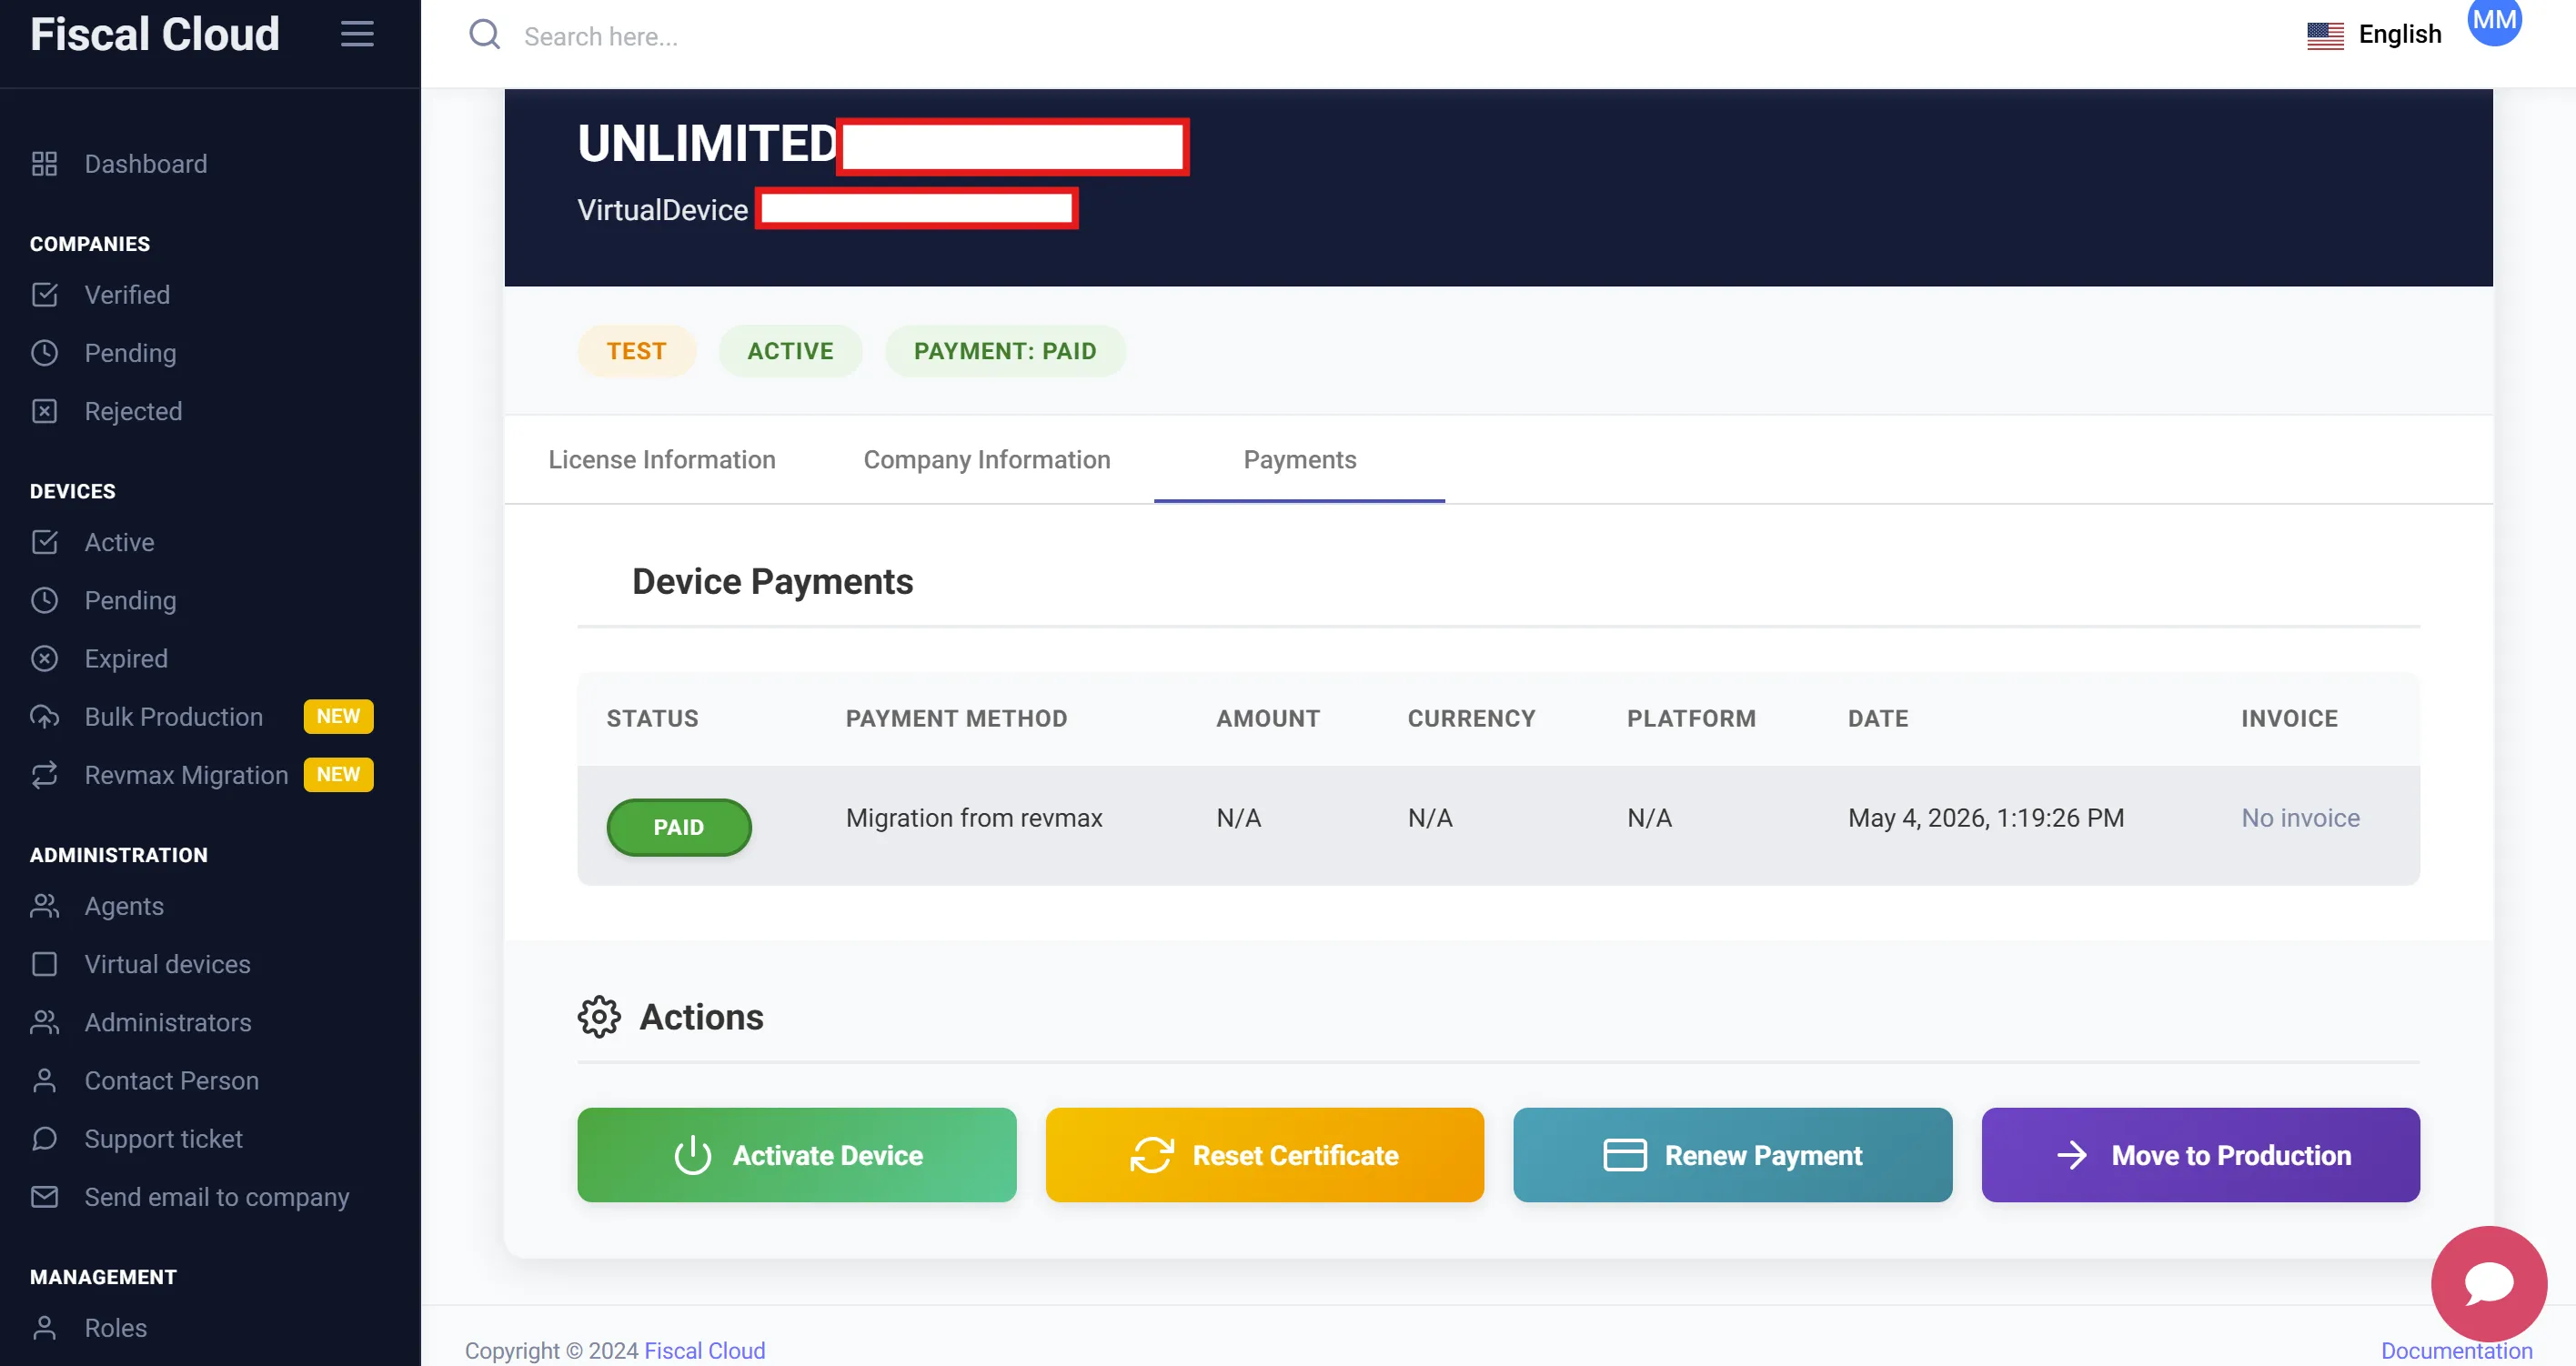
Clicking on a device opens its detail view, which shows the device’s current status badges (TEST, ACTIVE, PAYMENT: PAID) and three tabs:
License Information
Displays the device’s license details:
- Serial Number
- License Start Date and License End Date
- License Key (copyable)
Actions
From the device detail view, administrators can perform the following actions:
- Activate — Activate the device.
- Reset Certificates — Regenerate the device’s certificates.
- Renew Payment — Process a renewal for the device’s subscription.
- Move to Production — Promote the device from the test environment to the live production environment.
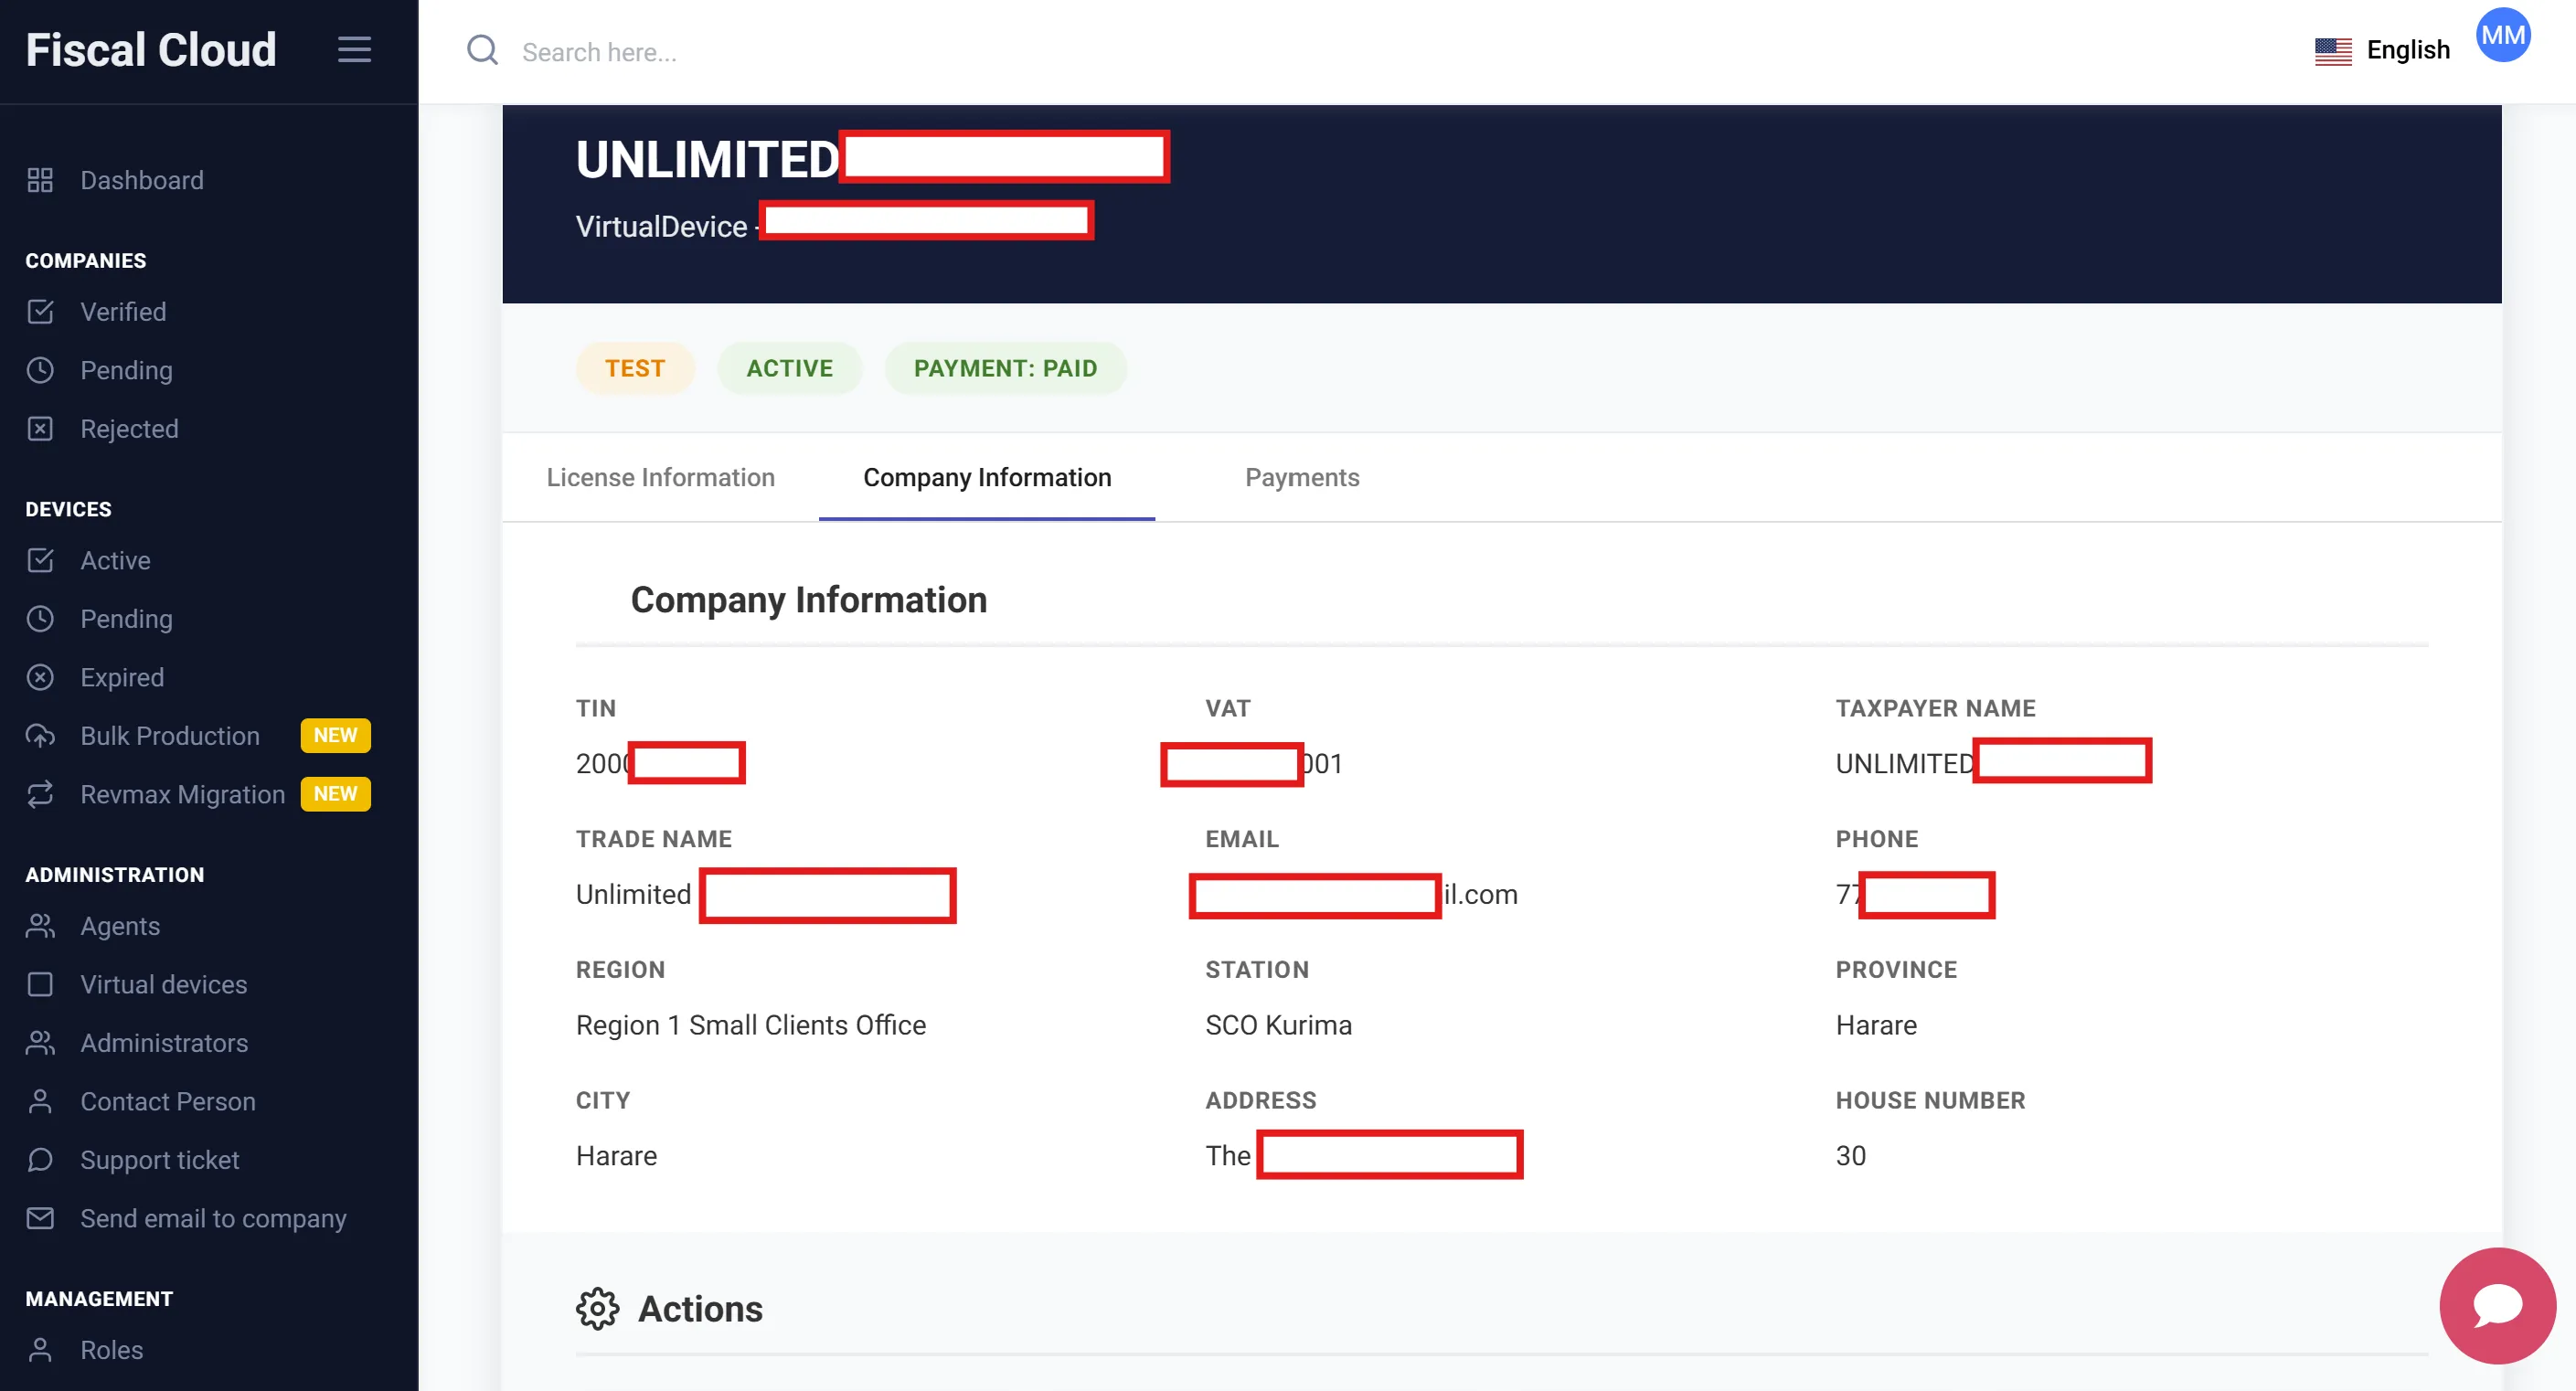
Company Information
Displays the company details associated with the device.
Payments
Shows the payment history for the device.
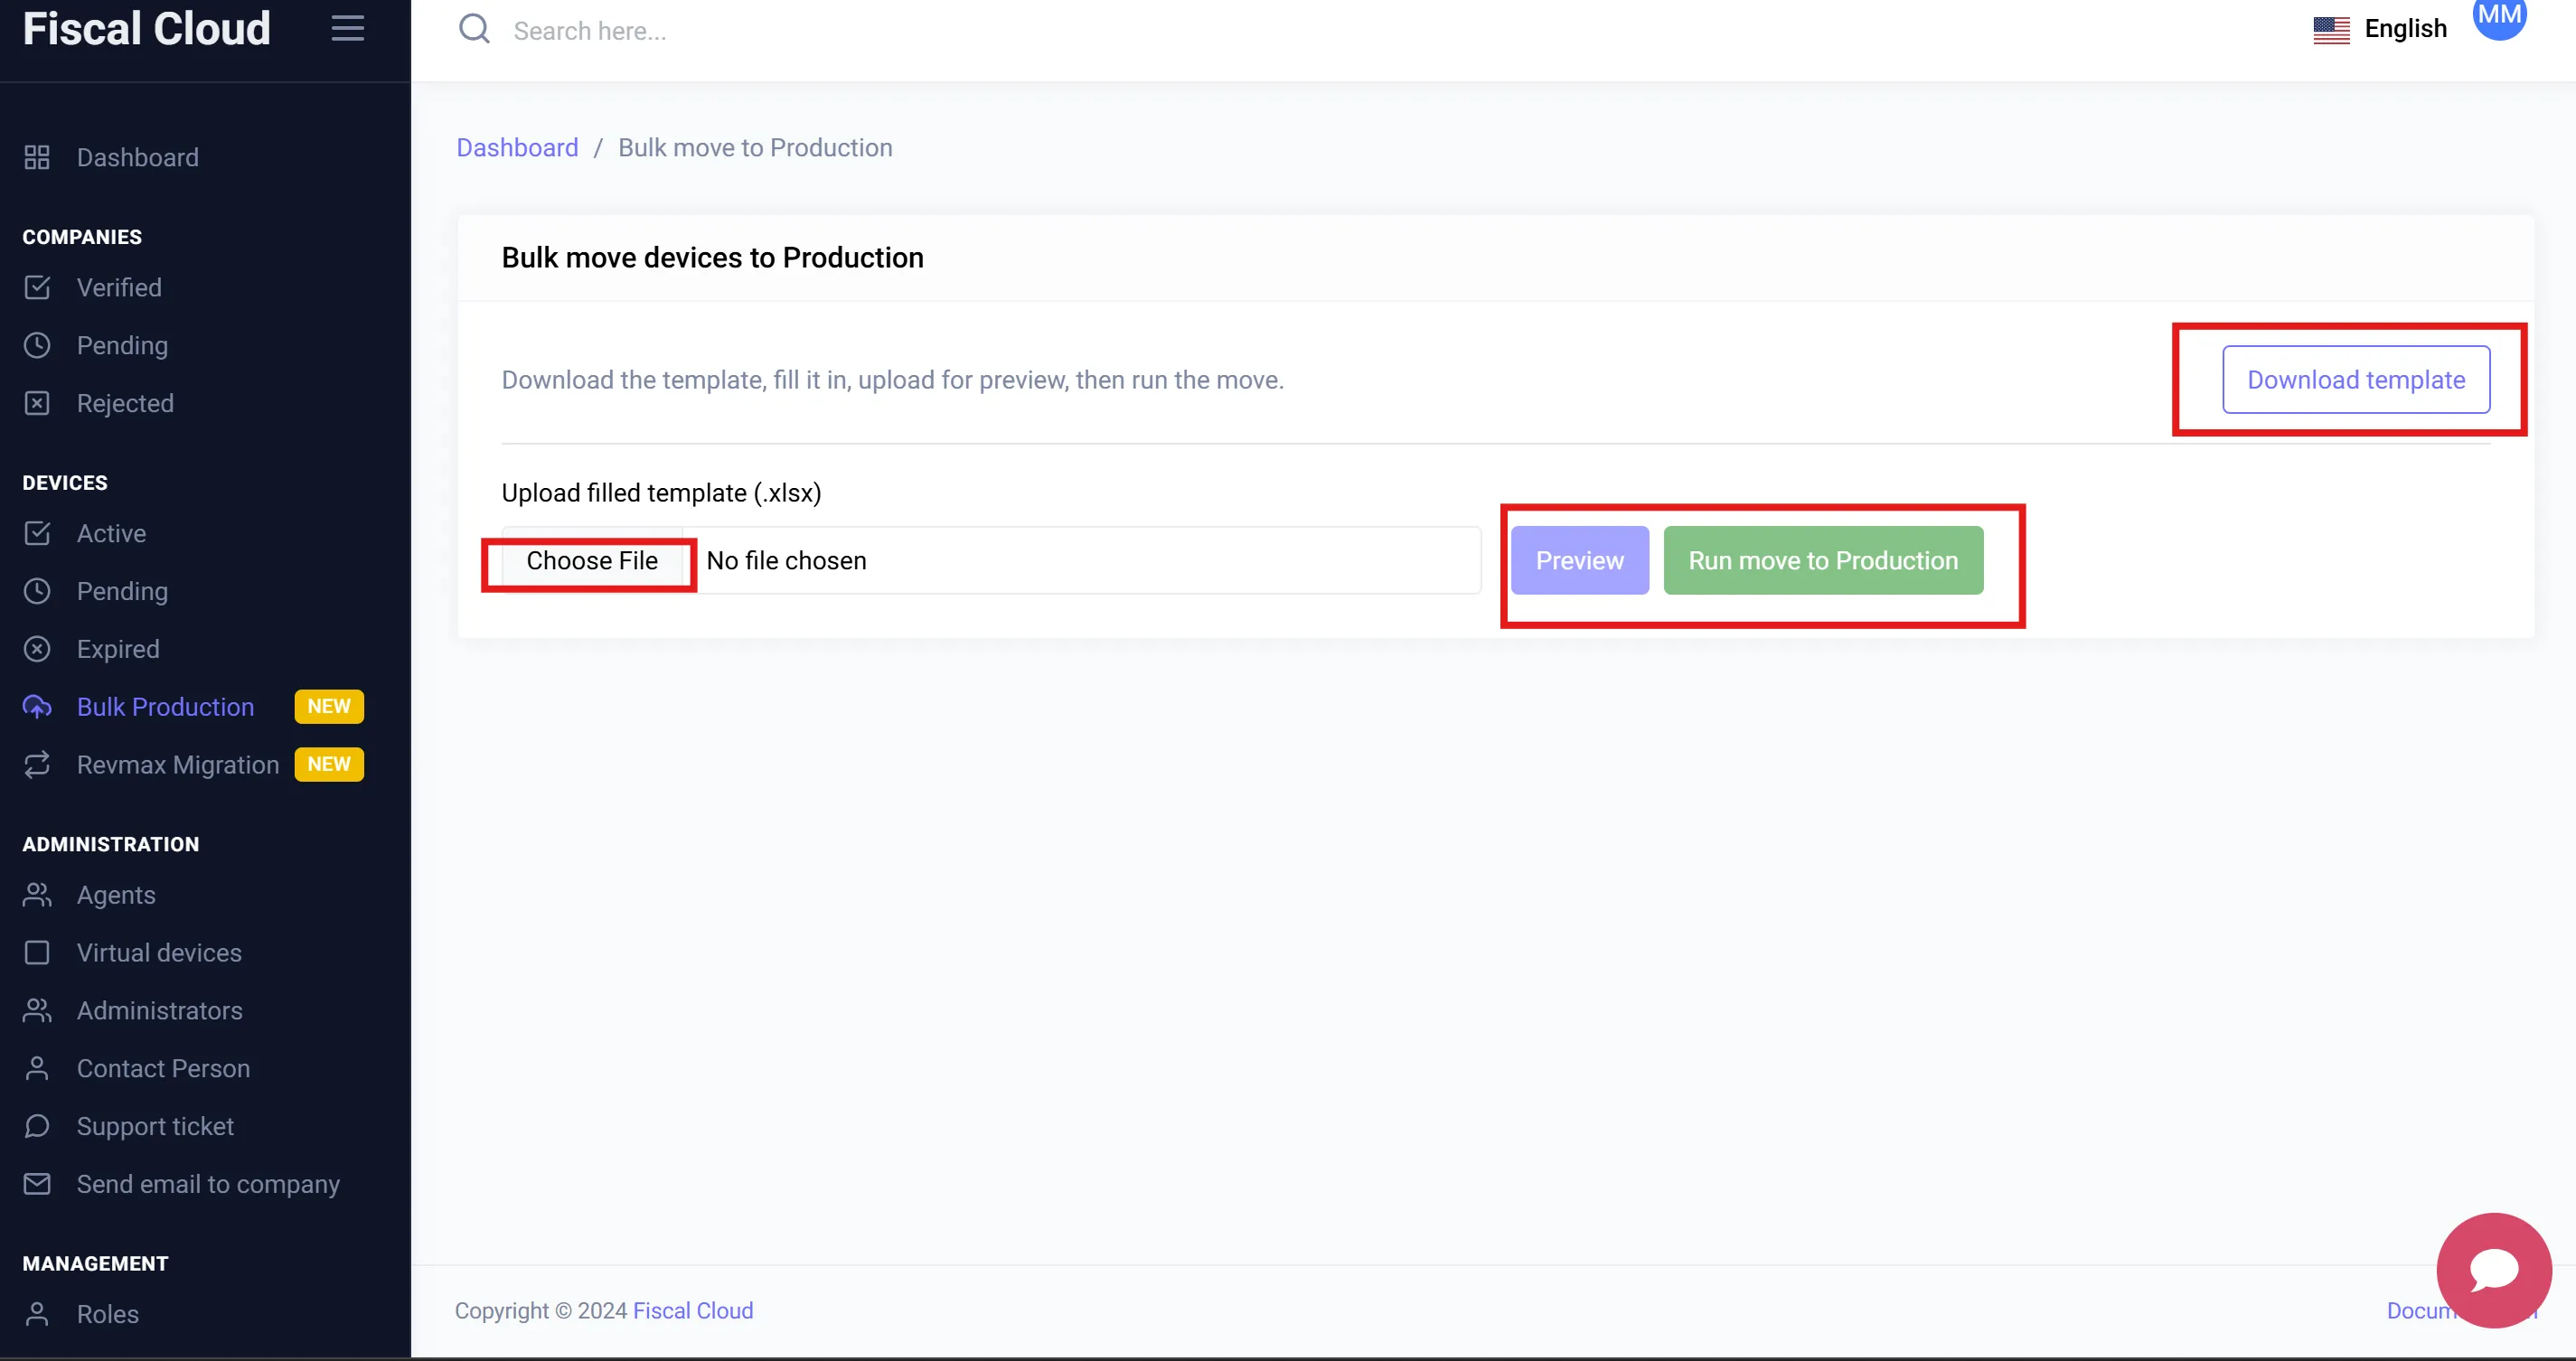
Bulk Production
The Bulk Production feature allows administrators to move multiple devices into production at once, instead of doing them one by one.
To use Bulk Production:
- Click “Download Template” to get the Excel template.
- Fill in the required device details in the template.
- Upload the completed
.xlsxfile using the “Choose File” button. - Click “Preview” to review the data before applying.
- Click “Run move to Production” to move all listed devices into production.
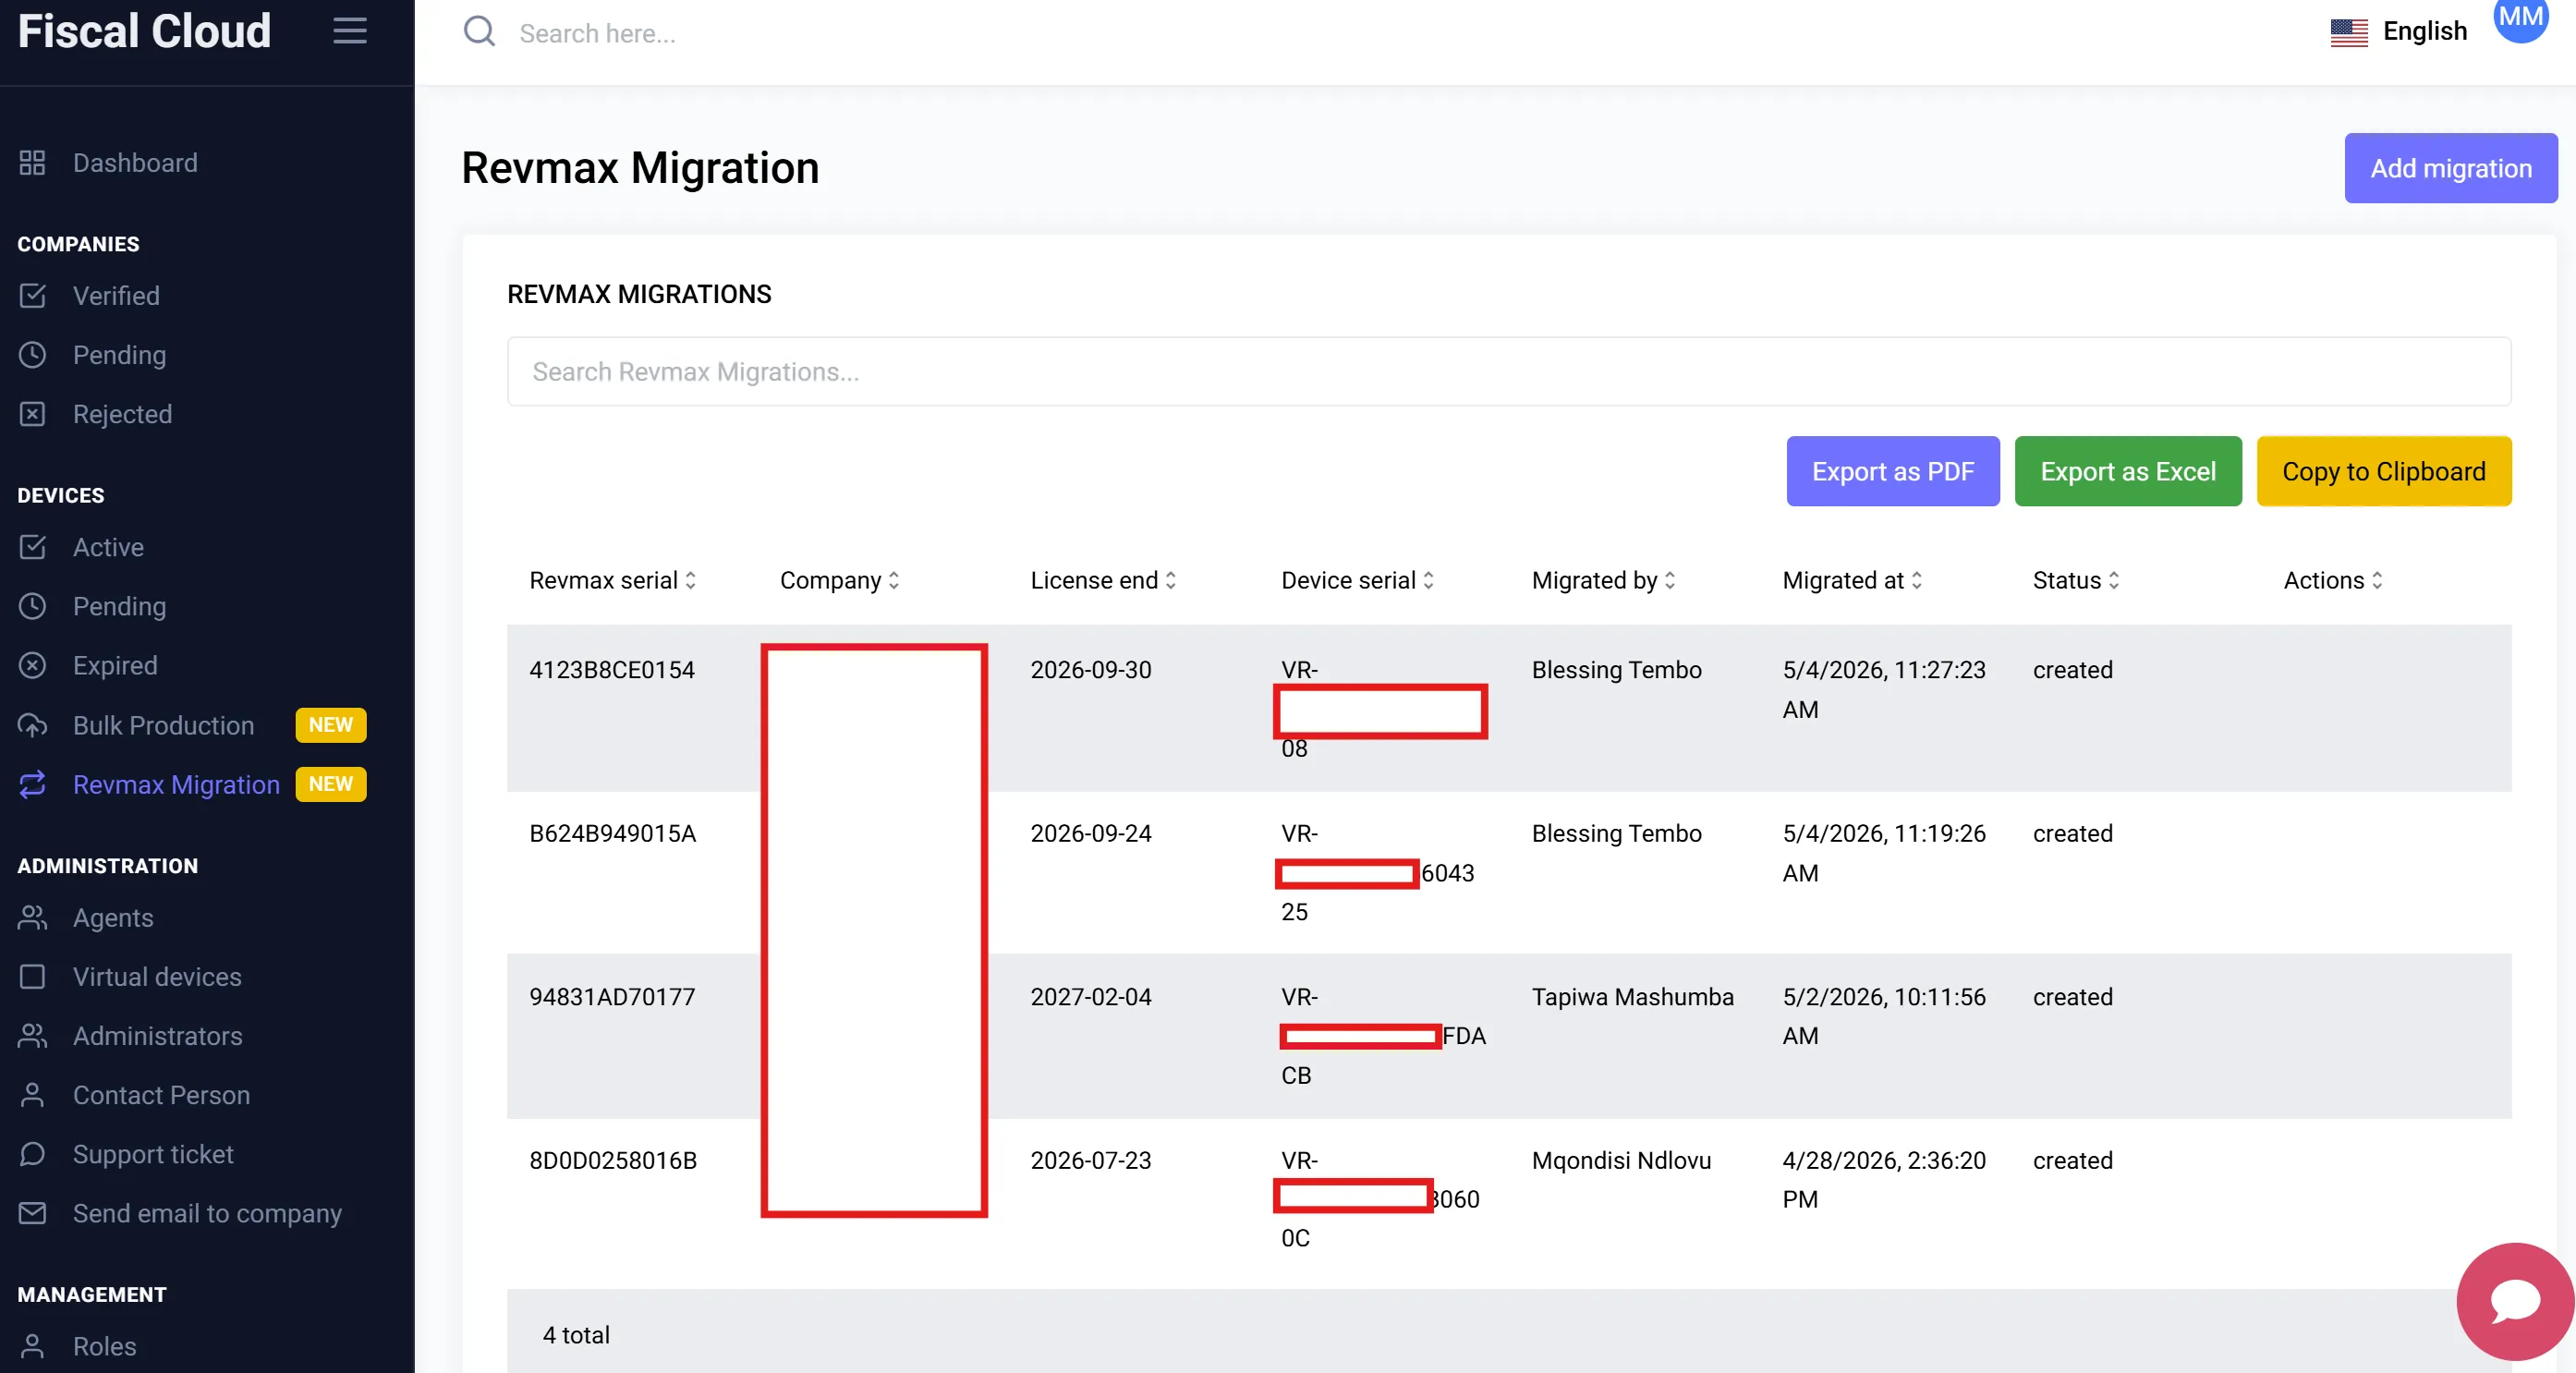
Revmax Migration
The Revmax Migration feature allows administrators to convert a physical Revmax fiscal device into a Fiscal Cloud virtual device.
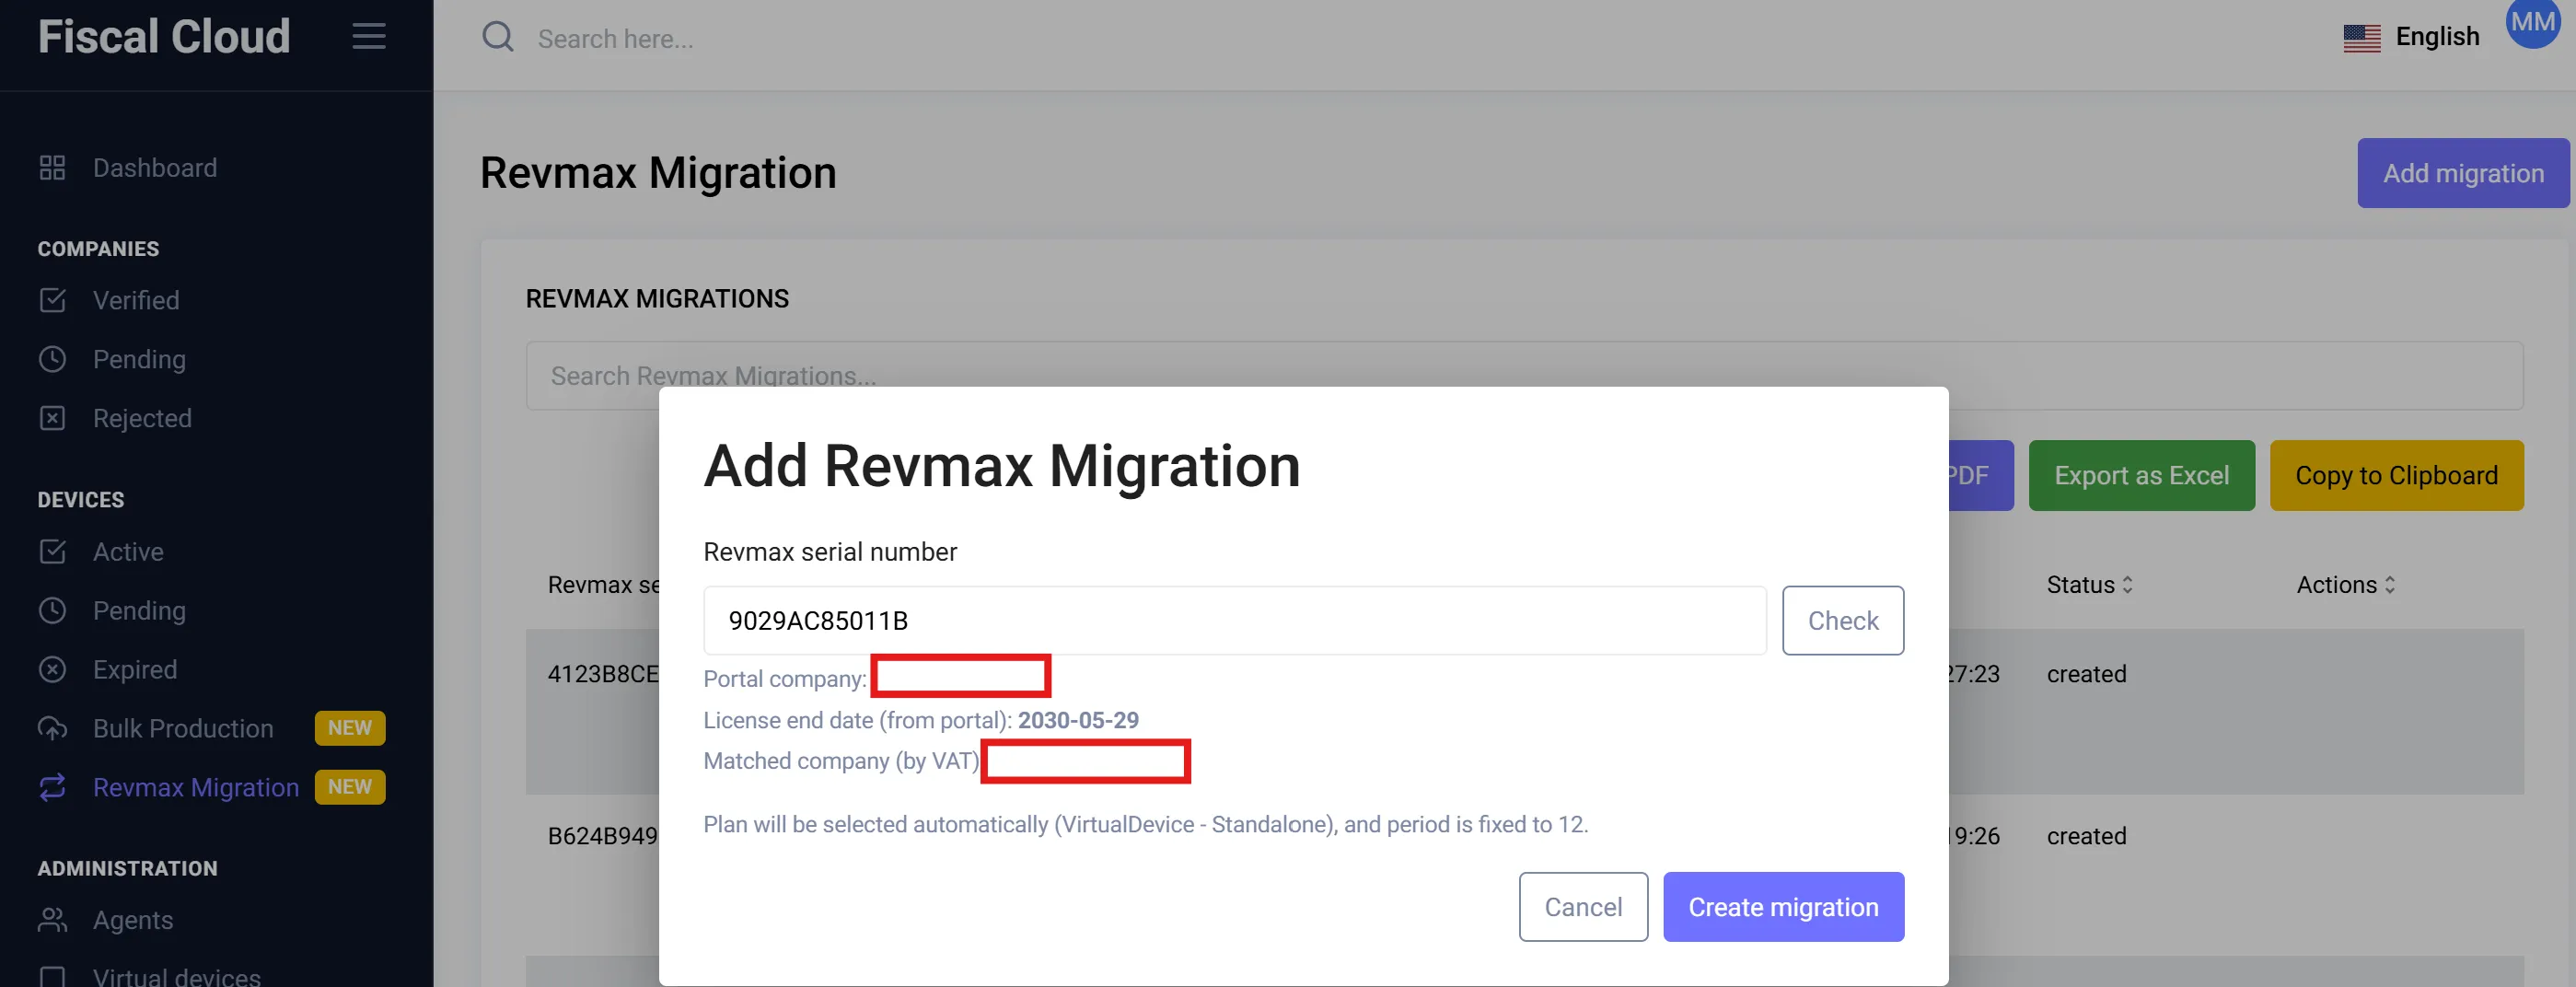
To add a migration:
- Click the “Add Migration” button at the top-right corner of the page.
- Enter the Revmax Serial Number in the field provided.
- Click “Check” — the system will look up the device and display:
- Portal company name
- License end date
- Matched company (by VAT)
- The subscription plan that will be applied automatically
- Click “Create Migration” to complete the conversion.
The migration will then appear in the Revmax Migrations list with its status, Revmax serial, matched device serial, and the administrator who performed the migration.